Related Articles
CA18DET Inline Oil Cooler (UK Factory Oil Cooler)
Preface
As I mentioned in the Inline Oil Cooler Guide the inline cooler leaves room for the addition of a thermostatic switch style oil sender that can be used to add another oil cooler to the system. These senders (also called sandwich adapters) are traditionally used in front mount oil coolers. The thermostatic variant includes a little metal coil that opens at a certain temperature (160 degrees fahrenheit in this case) and begins flow to the oil cooler once the oil reaches this temperature. This serves the dual purpose of not cooling the oil at startup to allow it to reach operating temperatures and then to only cool the oil after a certain temperature to avoid over cooling which can reduce the efficacy of the oil.
In the previous setup with the inline oil cooler only, the oil is cooled by engine coolant from the block. This helps equalize the oil and coolant temperatures and brings the oil down closer to 200 degrees. By installing a sandwich adapter between the filter and the inline cooler filter mount, I am now able add more cooling to the system by directing oil to a second cooler directly from the housing. In this case, I am using transmission cooler built directly into my transmission. Alternately, you can use a traditional front mount oil cooler if using a standard Nissan or Koyo radiator.
Considerations
Just a few things of note before getting started. I recommend you go ahead and read the original article on the inline oil cooler for the ca18det so you can jump right in. Furthermore, I am using 1/4″ brake lines for the oil lines. My motor sits on hockey puck motor mounts and sees very little vibration. If your motor is on factory mounts and vibrates moderately, this motion could cause hardlines to fatigue over time so you may want to substitute high pressure rubber lines and brass nipple fittings in place of the compression fittings and hard lines I am using.
Tools/Parts
(NOTE: Your parts may vary since I am not using a Nissan specific radiator or a front mount oil cooler)
- brake line bender
- tube cutter
- flaring tool
- sandwich plate w/ thermostatic switch
- 2 x 3/8″ brass elbow
- 2 x 3/8″ to 1/8″ brass adapter
- 4 x 1/8″ to 1/4″ compression fitting
- 2 x 3ft 1/4″ brake lines
- pipe sealant tape
- RTV silicone
Install
Step 1: Start by removing the oil filter base from the block and then lay the inline oil cooler, pipe sealant tape, brass adapters and the thermostatic switch in front of you. Place a small bead along the outside of the edge of the sandwich adapter and install the adapter to the inline cooler mount as shown below.

A thin bead of RTV was placed around the edge of the sandwich adapter before connecting it to the filter mount.

The adapter is then secured to the mount with the center stud as shown. This is an extension that will come with the adapter.
Step 2: Now go ahead and thread the 3/8″ elbows into the two ports on the sandwich adapter. Then adapt the 3/8″ end to 1/4″ using your brass fittings. Be sure to use the thread sealant tape on each connection to avoid leaks. Once finished, ensure that everything is tight on the oil housing and install the the unit back to the block.

With the adapter off you can see how I adapted the 3/8″ ports on the adapter to 1/4″.

Reinstall the unit into the block. Note the brass fittings to the left of the oil filter
Step 3: In my case, I now added the 1/8″ to 1/4″ adapters to the radiators 2 transmission cooler ports. Due to the length of the 1/8″ thread, I used 2 x 5/16″ washer to pad the thread depth engagement in the cooler ports. Again, thread sealant tape was used for these connections.

The 1/8″ by 1/4″ inch adapter is padded with 2 x 5/16″ washers before threading into the built in cooler.

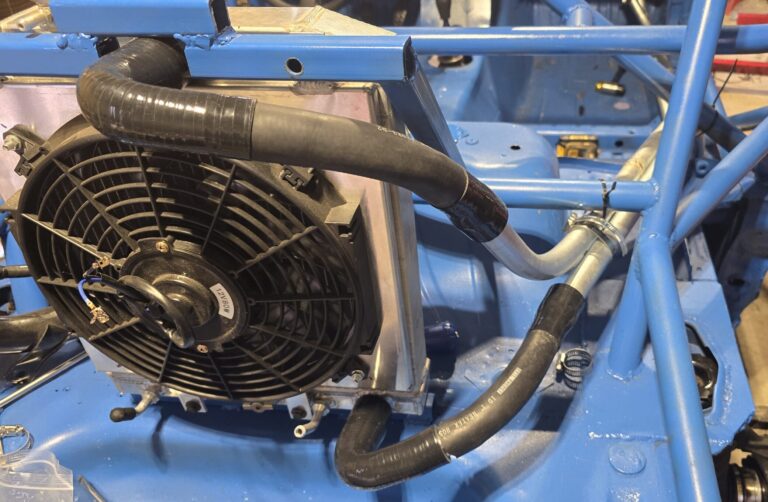
The 1/8″ to 1/4″ adapters installed in the transmission cooler of the radiator.
Step 4: If you are using hard lines (brake lines) you will want to begin bending the lines along a free path from the sandwich adapter to the cooler. I started at the adapter for ease of tightening and ran the lines above the oil filter to keep filter access easy. Also, when you cut the lines, make sure to flare the new ends so the lines will seal properly.

I recommend starting at the sandwich adapter.

These lines can be bent by hand but using a tube bender will ensure the bends are smooth and kink free.

The first brake line is bent to 45 degrees to angle the line around the oil filter.

After loosely installing the line in the adapter port, another 45 degree bend angles the line towards the radiator.

With the rear portion angled, you can now determine how much needs to be cut from the end of the line.

Note the lack of a flare on the cut end.

Use the flaring tool to flare the cut end.

The re-flared end should look like this.

Make the appropriate bends and connect the first line to the radiator. Tighten the connections down and then repeat for the second line. The end result will look like this.
Related Articles
CA18DET Inline Oil Cooler (UK Factory Oil Cooler)


