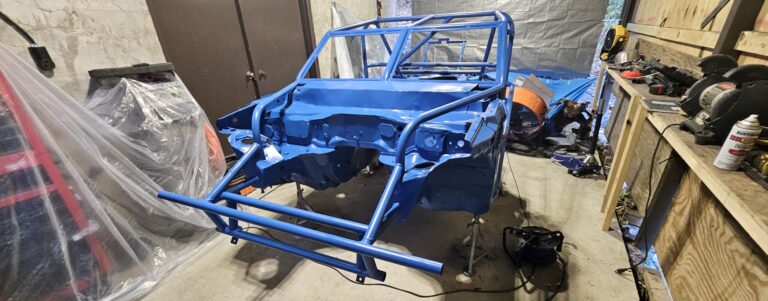
The minimalist chassis of the Miata Exo Car (aka ‘ghettocet’) makes it the perfect platform to test ideas. Complex designs become relatively easy, like mounting the radiator in the rear. And very early in the build process, I decided on such a rear mount design.
As I near the end of the ‘Ghettocet’ build, it is time to finish some of these more complex systems. As such, the following is the fabrication process I used to mount the radiator in the rear, my thought process, future improvements, results, etc.
Why I Moved the Radiator to the Rear?
I have several reasons for mounting the radiator in the rear of the Miata. Firstly, on these kart / exo car builds, the radiator has zero protection if left in front of the engine. Cars generally have front bumper covers with cooling inlets or grilles. In road applications, these openings provide a surprising amount of protection to the cooling system.
Racing applications are another story. The track environment is violent to the front of the car. Rubber, rocks, and even an errant nut or bolt can easily gain enough velocity to puncture the radiator. We run mesh screens in the front grille of most cars, making these punctures rare. However, with the design of the ‘ghettocet’ affording zero protection, I have two choices. Build a secondary enclosure to protect the radiator or move it to the back. I chose the latter.
Benefits of Moving the Radiator to the Rear
How do increased cooling capacity, optimal weight distribution, and aerodynamic improvement sound? Pretty good, right? However, all these benefits come at the cost of added complexity and potential loss of reliability if poorly executed.
Increased Cooling Capacity
The radiator is no longer constrained to factory tolerances or positioning. Not only can a larger radiator be used, but it can be mounted horizontally or vertically as well. In this case, and to keep things simple, I am mounting the radiator in the vertical position. In doing so, I can use the radiator’s fill neck as the system fill point. Horizontally mounted systems will require a second fill port.
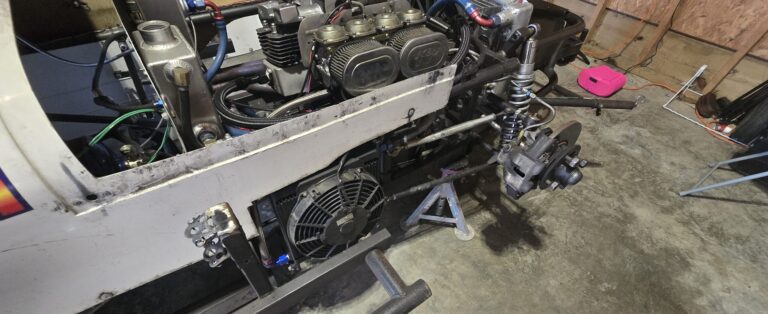
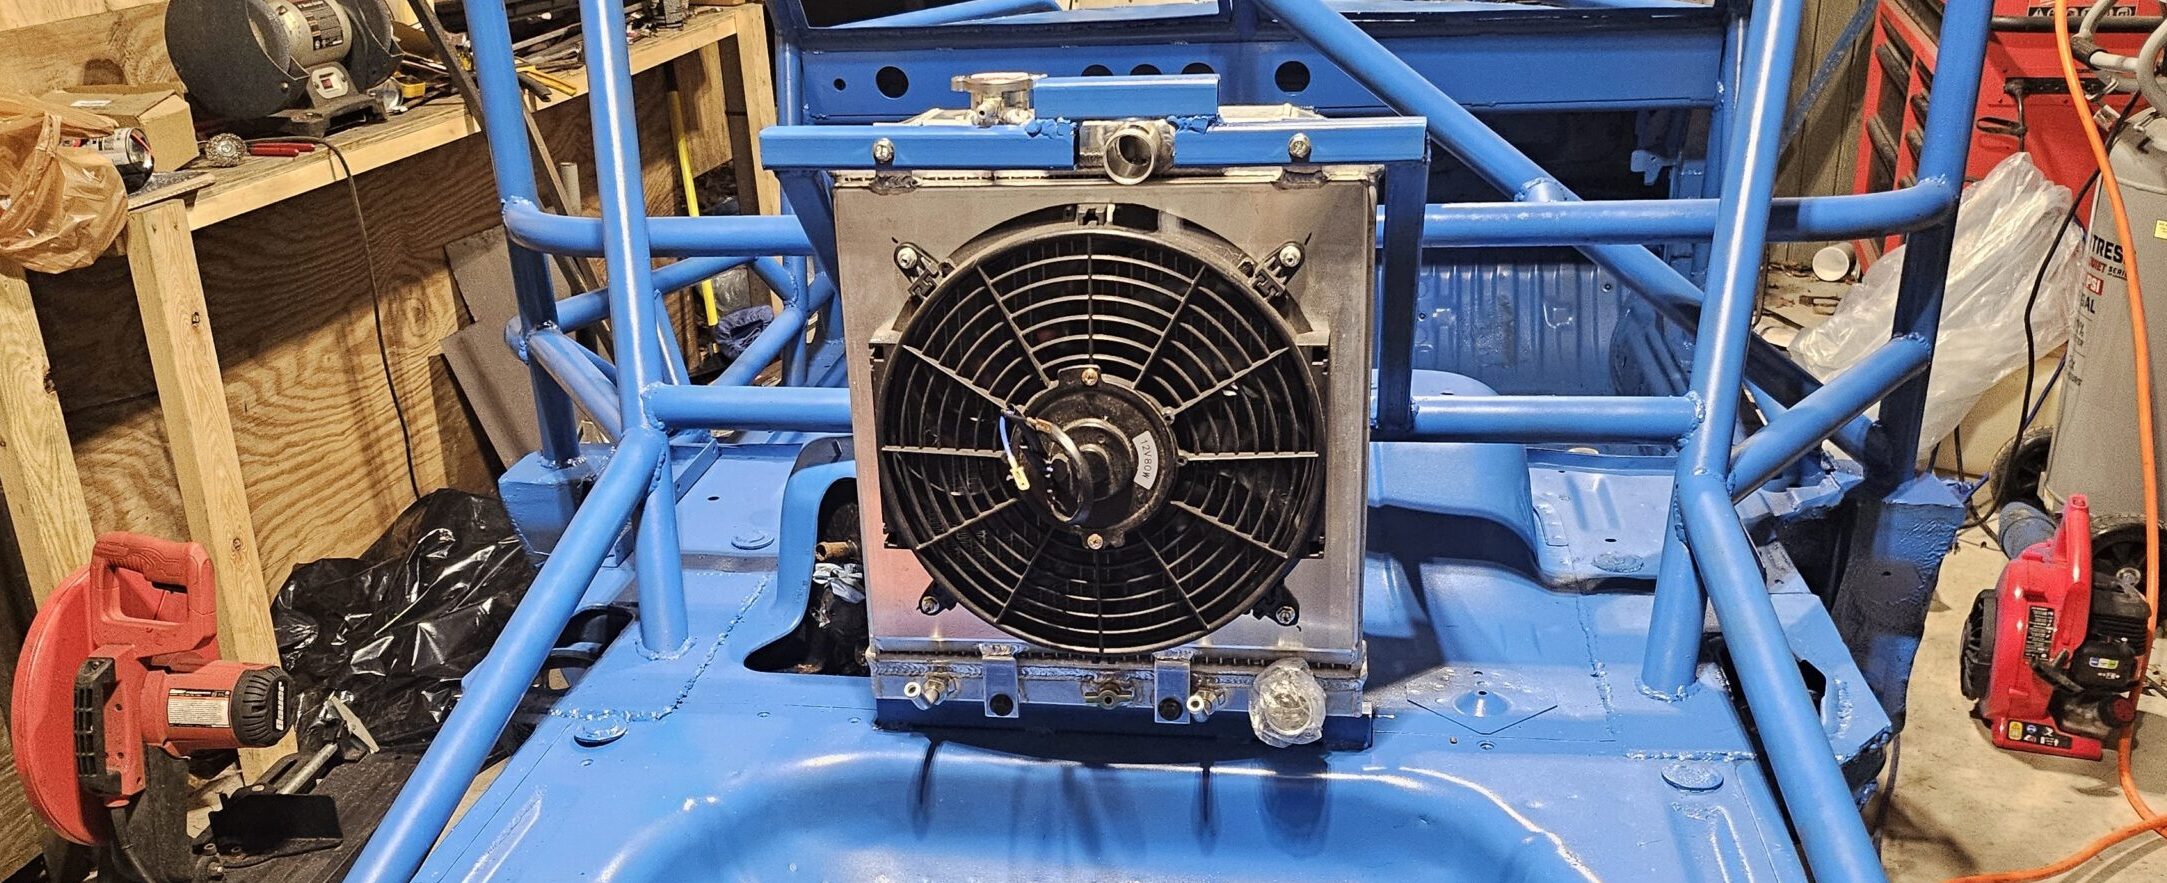
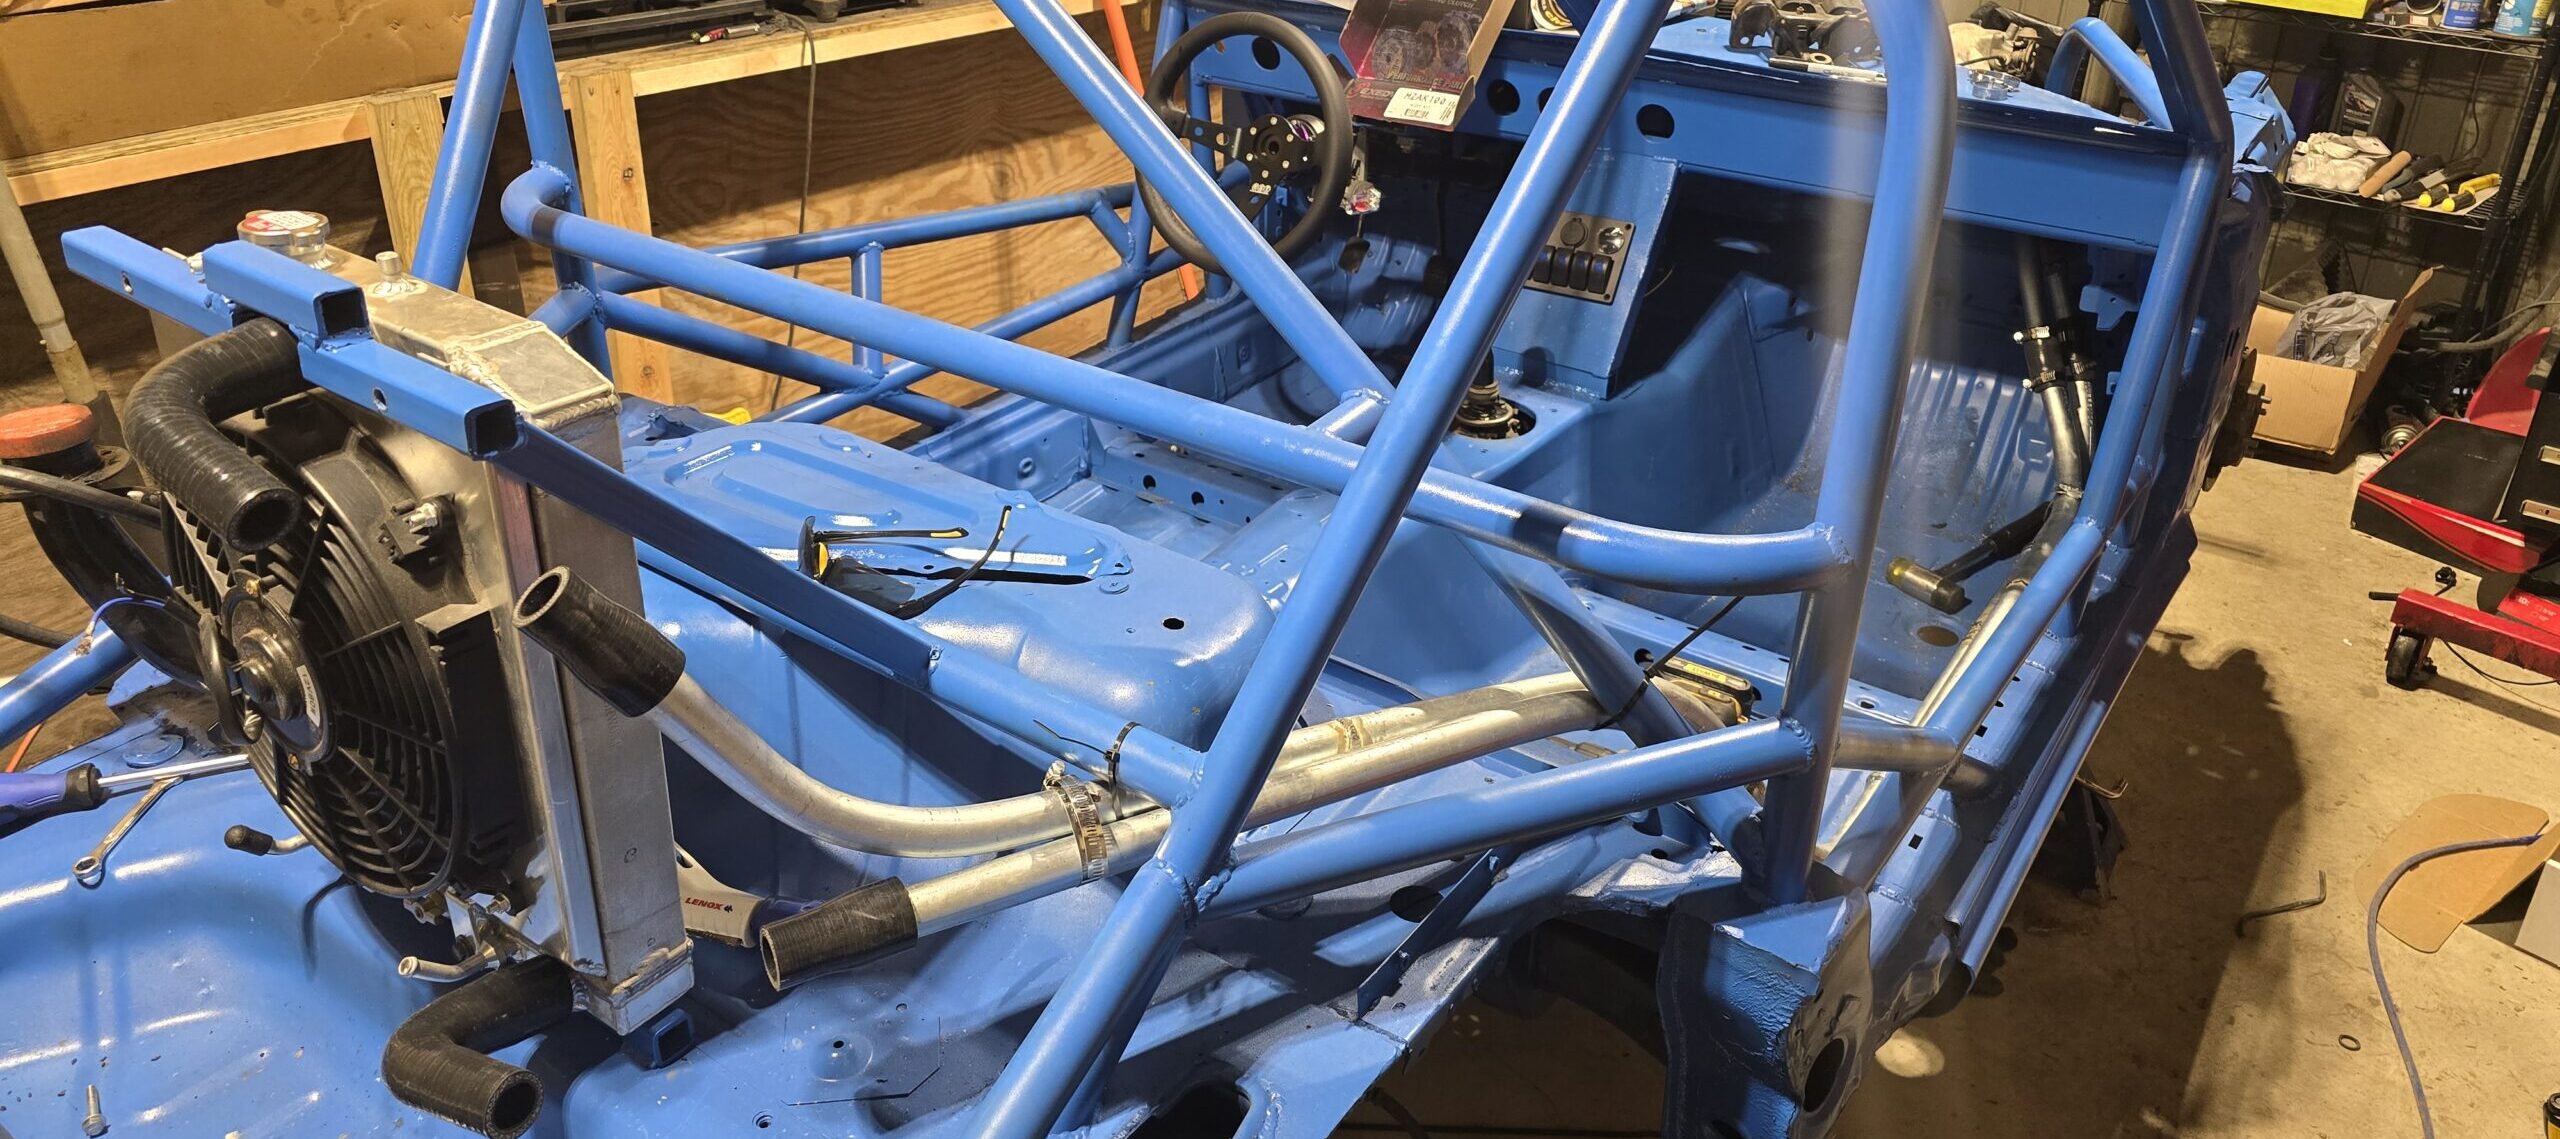
For this build, I chose a 3-inch thick, shrouded aluminum radiator typically found in high-performance Hondas. As the Miata runs the 1.6-liter engine, this should be sufficient.
(Note: The fan is oftheutmost importance for my build as I will not have any fancy ducting to feed air to he radiator. This fan will most likely run full time once the engine is up to temp.)
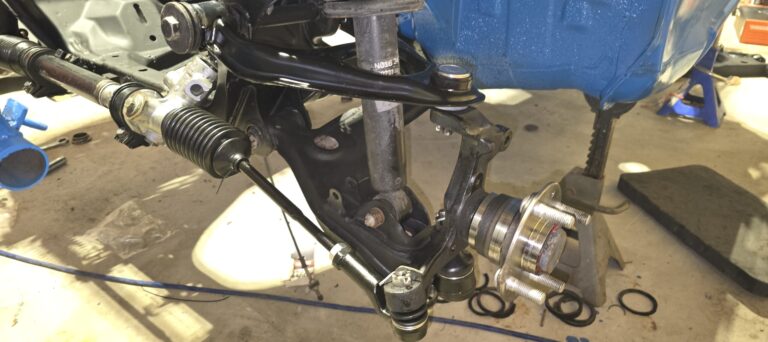
Optimal Weight Distribution
When it comes to weight removal, a disproportionate amount is removed from the rear during the exo car conversion. Making the nearly 50/50 weight distribution of the factory car no more. The chassis now has a significant forward weight bias. Not ideal for front-engine, rear-wheel drive cars. Any amount of weight I can redistribute to the rear will help. Not only does a rear-mounted radiator improve the weight distribution, but a rear-mounted battery helps as well.
(Note: As I mentioned, this build is a test bed, and the results will be used to imporve the Super Touring Miata. I notice that as I have gone to further extremes to lighten the racecar, the rear becomes less stable. This is partly due to a shift in the weight bias. Moving the radiator to the rear will help and allow for some creative improvements to aero.)
Aerodynamic Improvements
The Miata’s front grille is not ideal aerodynamically. The grille opening can be reduced or deleted without the forward radiator. Ultimately improving aero performance through drag reduction. Again, this doesn’t matter for this build but will be advantageous for the Super Touring racecar.
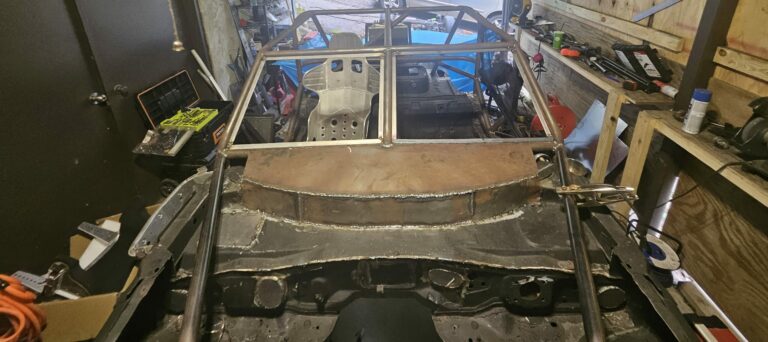
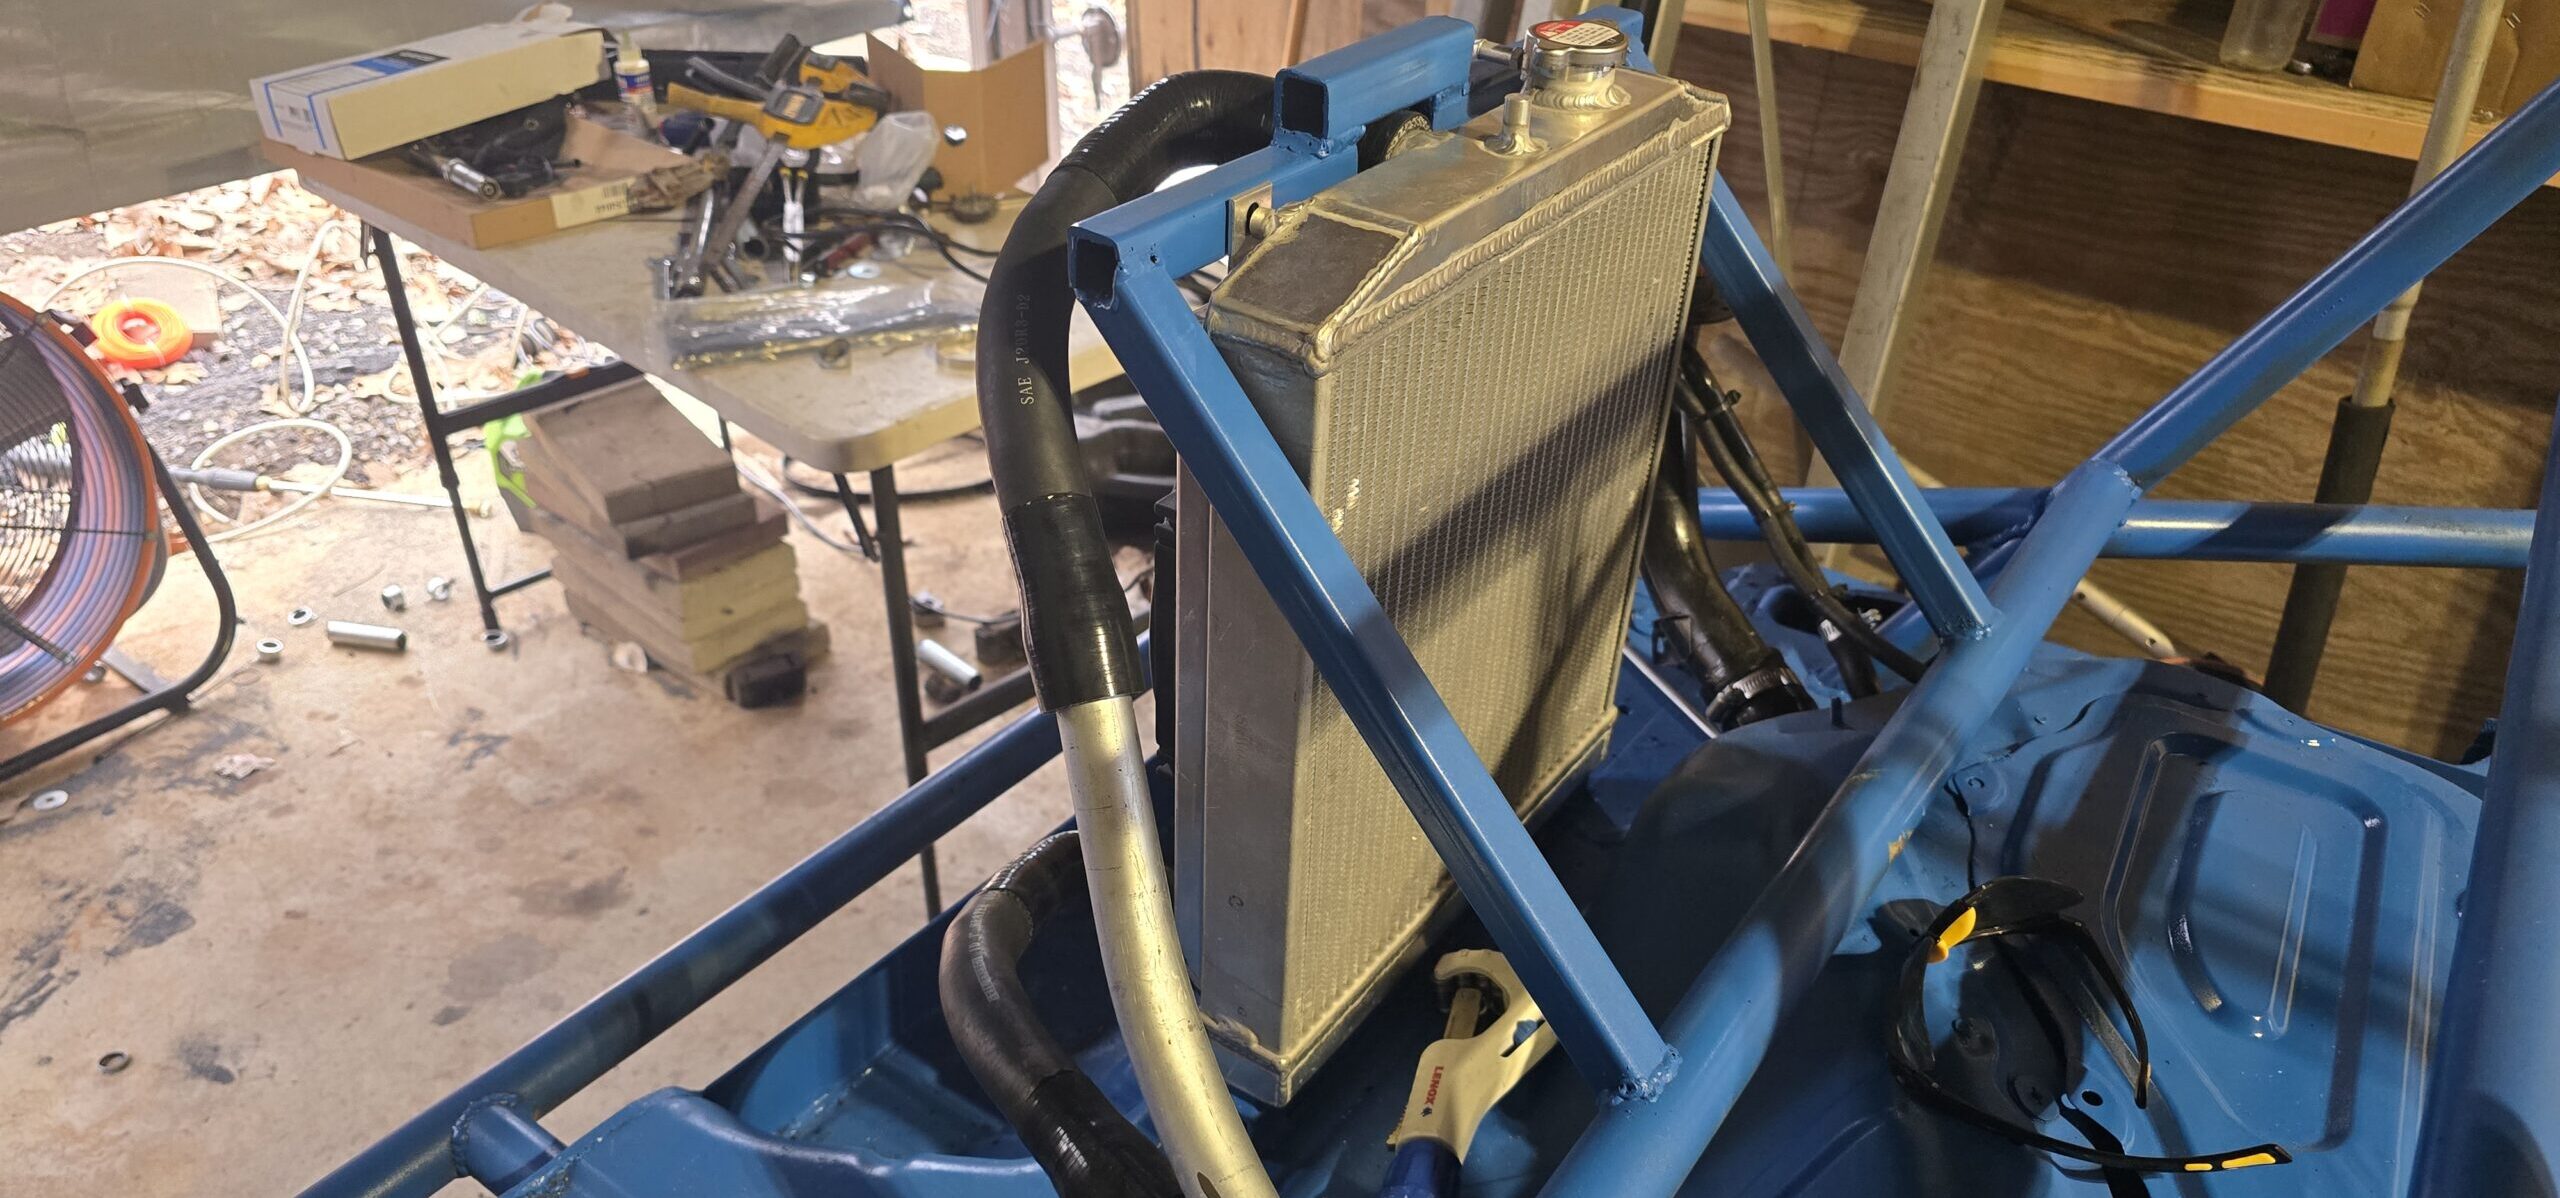
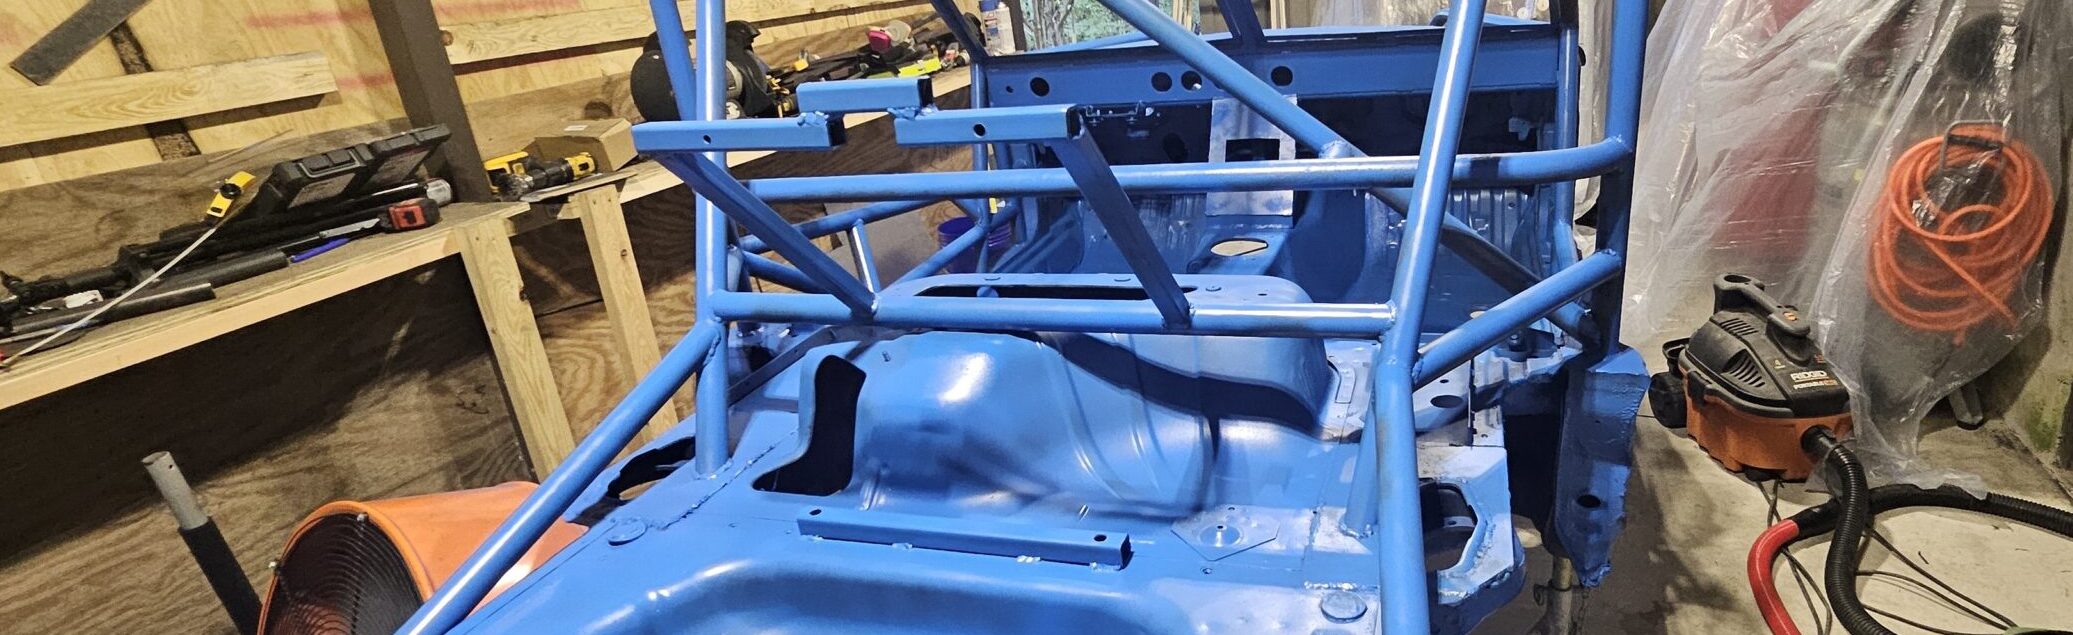
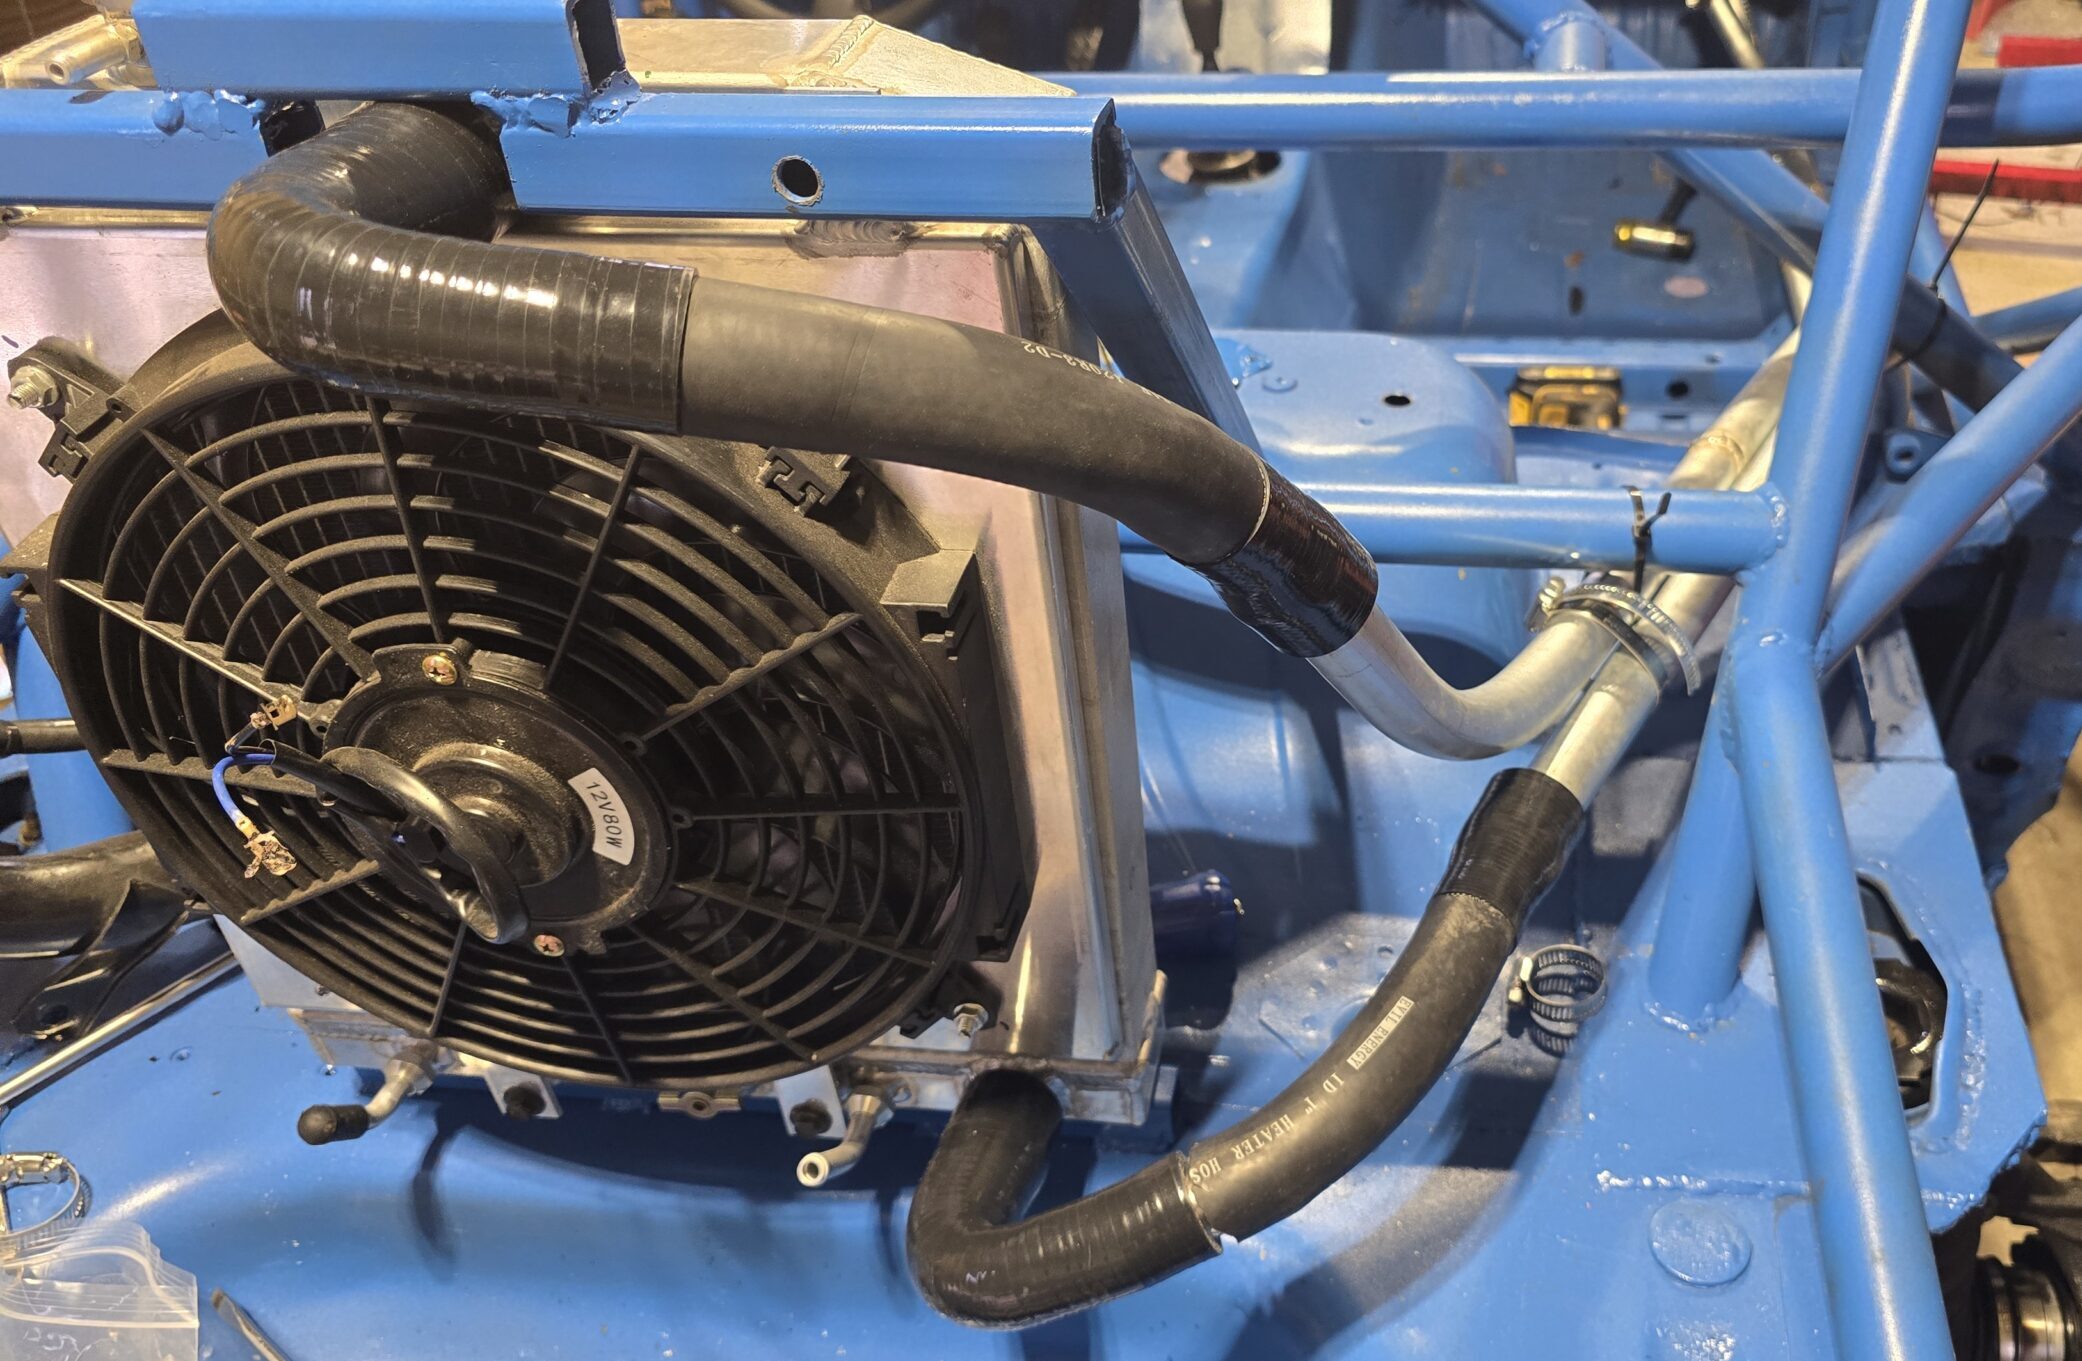
The Rear Radiator Mount
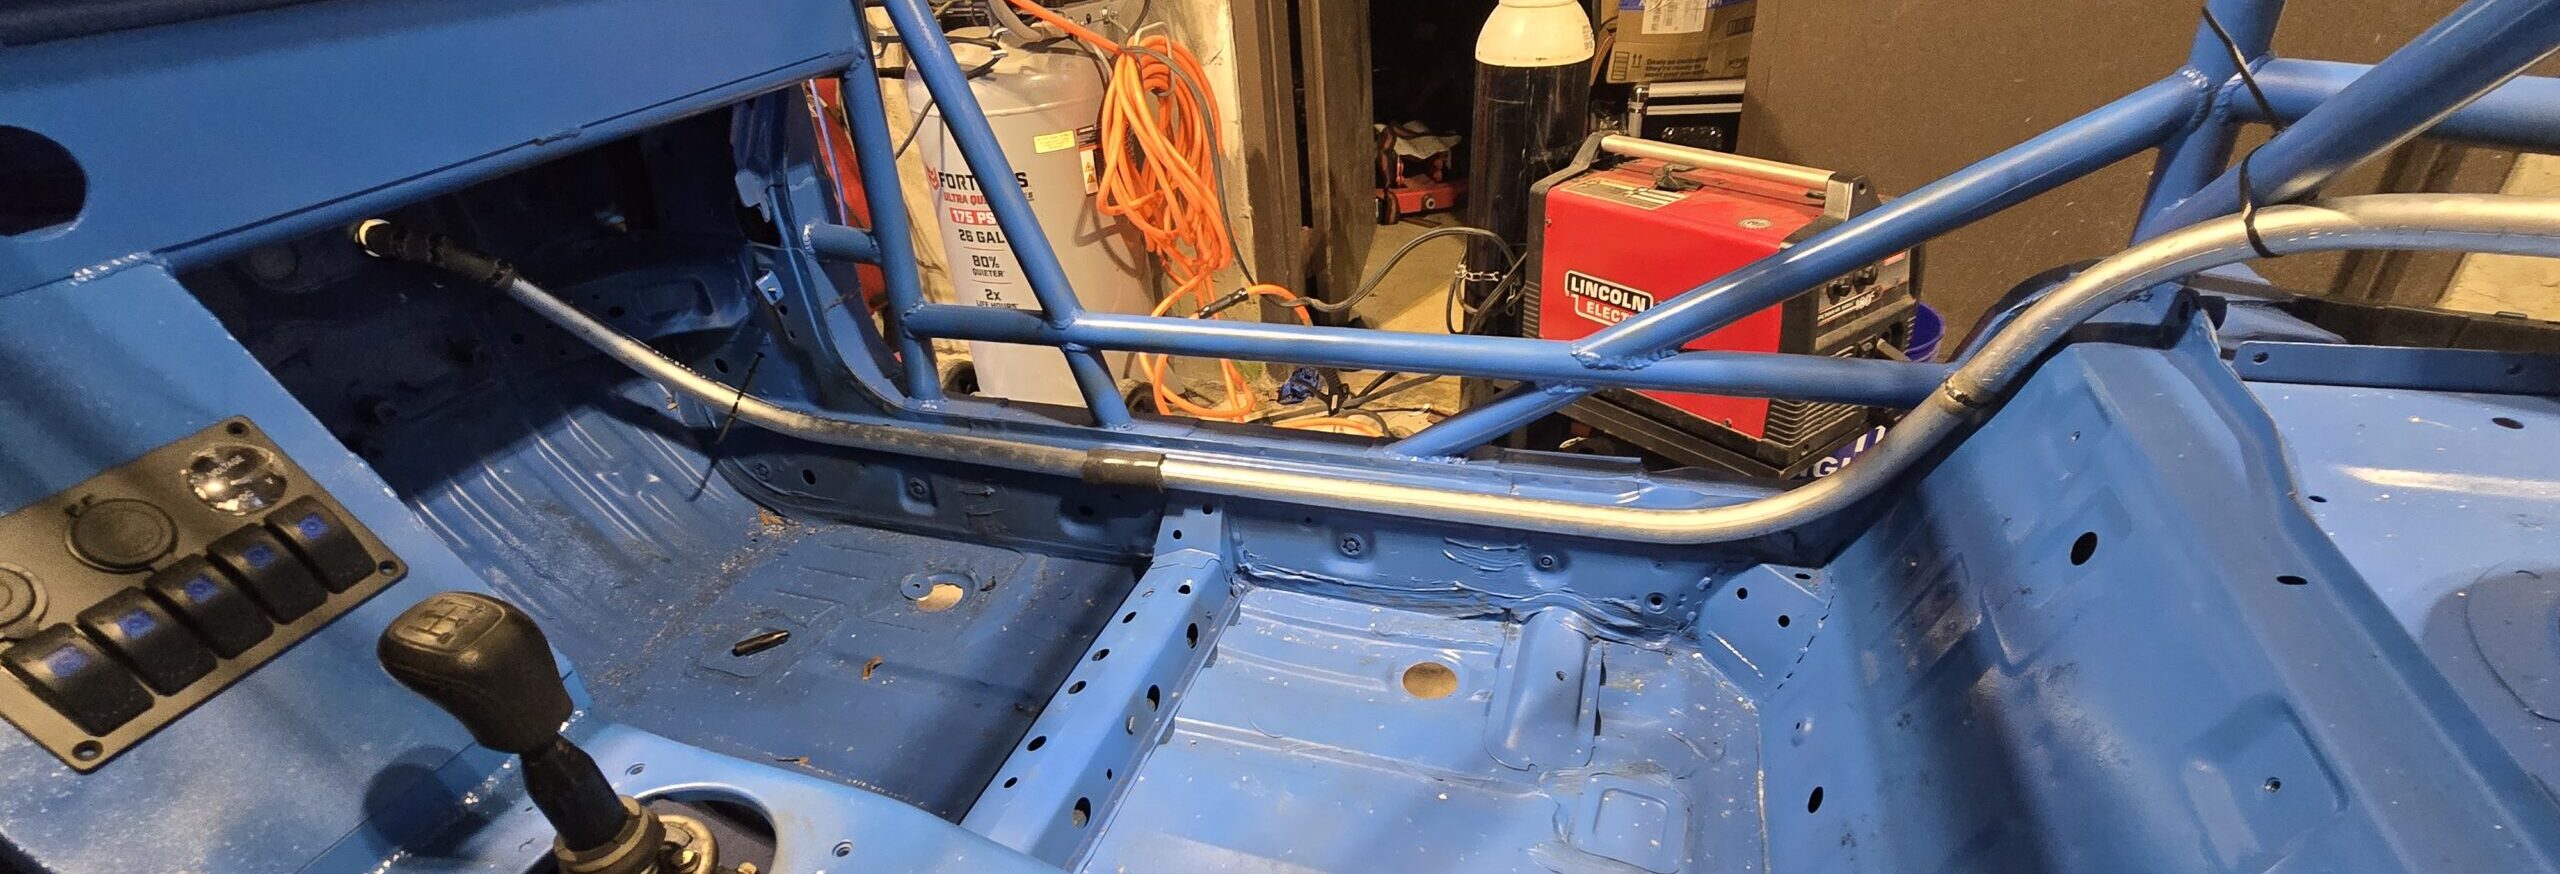
To start the installation process, I first fabricated the rear radiator mount. For the base, I welded a 1-inch square tube to the trunk floor just aft of the fuel tank. Two holes were drilled into this tube to insert the radiator base legs. Then, I ran two pieces of 1-inch tube from the roll cage rear cross brace at a 45-degree angle. A horizontal run then attached these. The entire structure creates a brace that the radiator snuggly fits in between. To secure the radiator, two long 10mm bolts are substituted for the upper fan shroud bolts. Securing the radiator firmly to the new frame.
Choosing Coolant Line Material
This is where the added complexity comes into play. With the radiator mounted in the rear of the Miata, I need to design a coolant path to it. After some research on a few off-road forums, I found that three materials are good candidates: thin-wall aluminum, copper, and EMT conduit. Being a test rig, I ultimately decided on the EMT conduit. It is inexpensive, readily available, and easy to bend and weld.
For sizing, I settled on the 1-inch inner diameter conduit to match the inner diameter of the factory system as closely as possible.
(Note: A couple of notes are valid here. First, the consensus online is to use 1.25-inch conduit, at least on the 4×4 and off-road sites. But these guys are running much larger displacements with more demanding cooling needs. My math says 1-inch will be acceptable, and I don’t mind trying it out. So, if you are duplicating this design, keep that in mind.
Second, the extra coolant line distance could add a nominal amount of ‘strain’ to the factory belt-driven water pump. I believe this is a nonissue as plenty of rear-engine cars run coolant loops with off-the-shelf pumps. The Lotus Elise and Toyota MR2 Spyder, two cars I am familiar with, come to mind. Regardless, I have plans to convert to an electric water pump in the future, mainly to test for potential power gains through parasitic loss reduction. I will link that here in the future.)
Fabricating the Coolant Lines
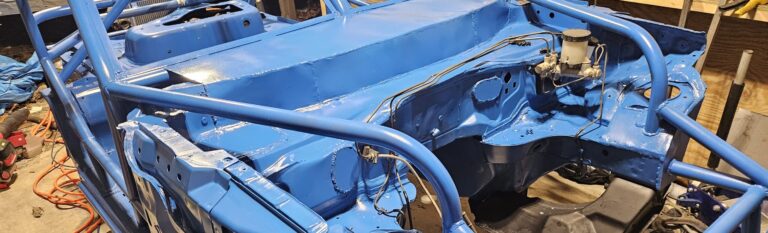
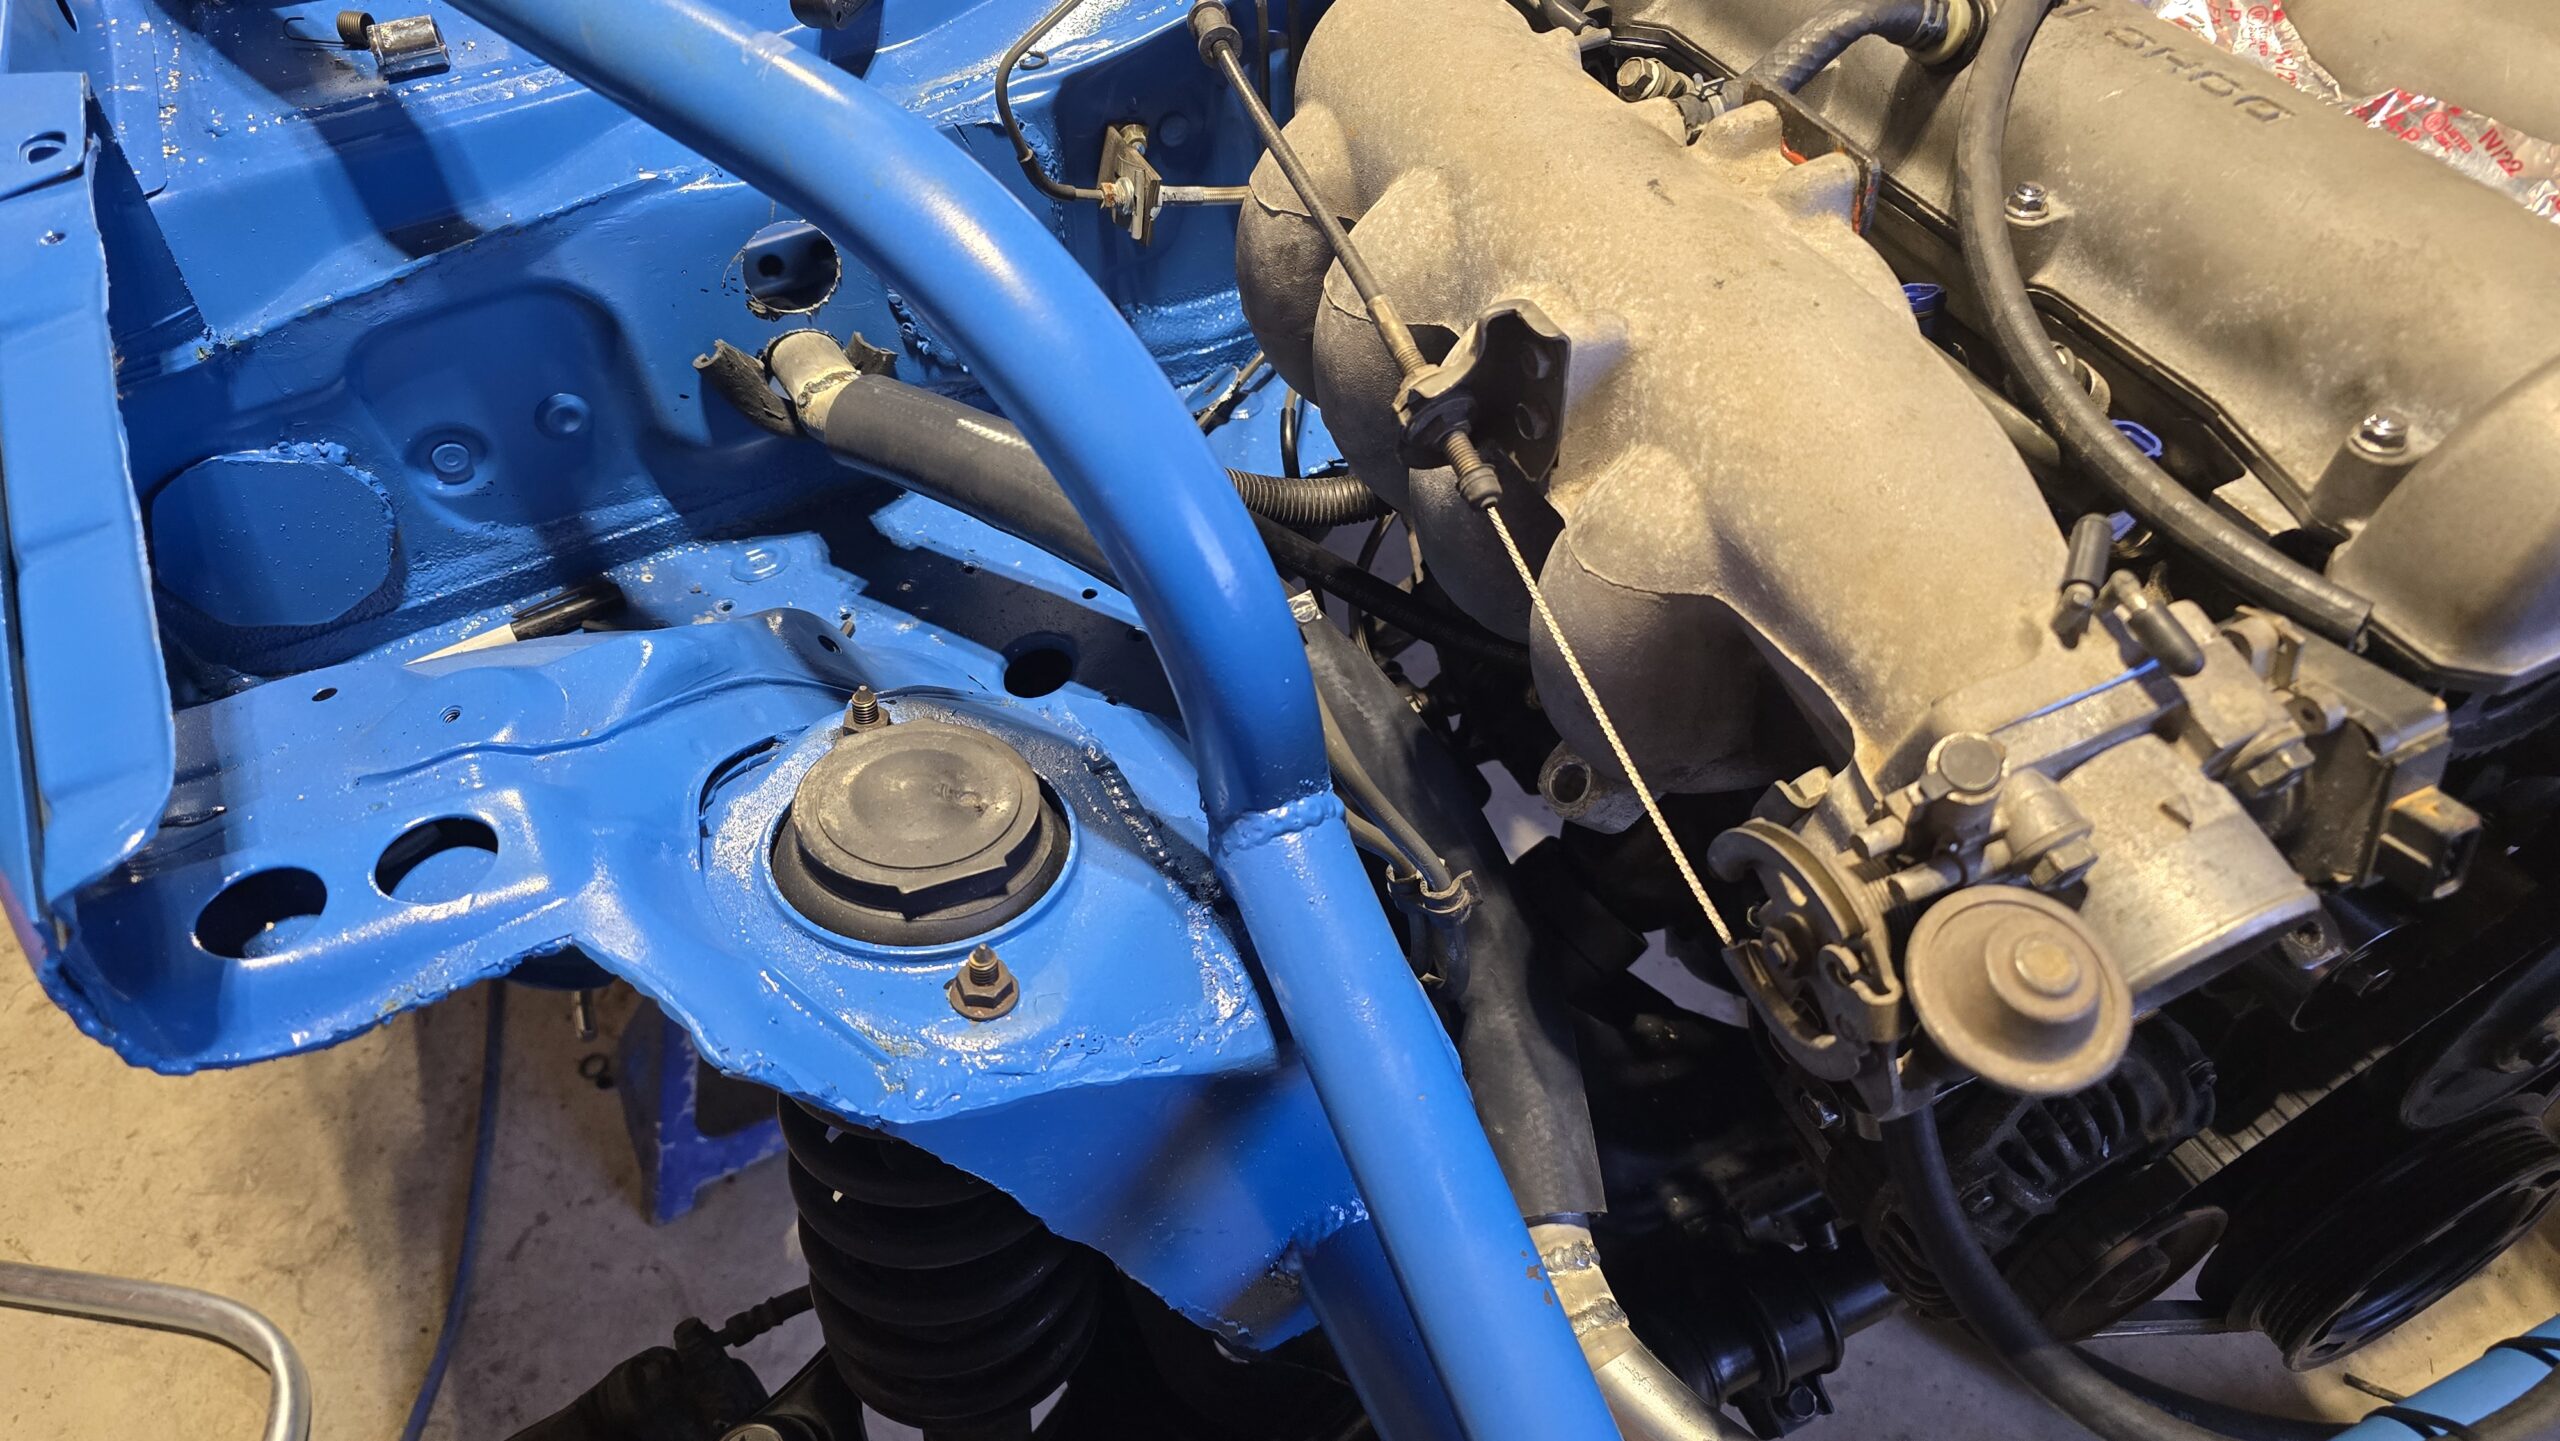
First, I needed to decide where to run the lines. I decided to pass the lines from the engine bay to the cockpit on the passenger side. Then, the lines turn down to the door sill, mirroring the sill as close as possible before running up the rear bulkhead and toward the radiator.
(Note: Although it is possible to use a single conduit run from the radiator through the firewall, I added a disconnect behind the firewall for both the hot and cold sides to make future adjustments/changes easier.)
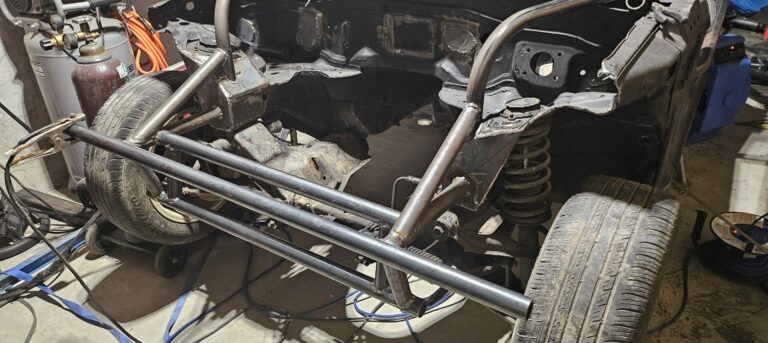
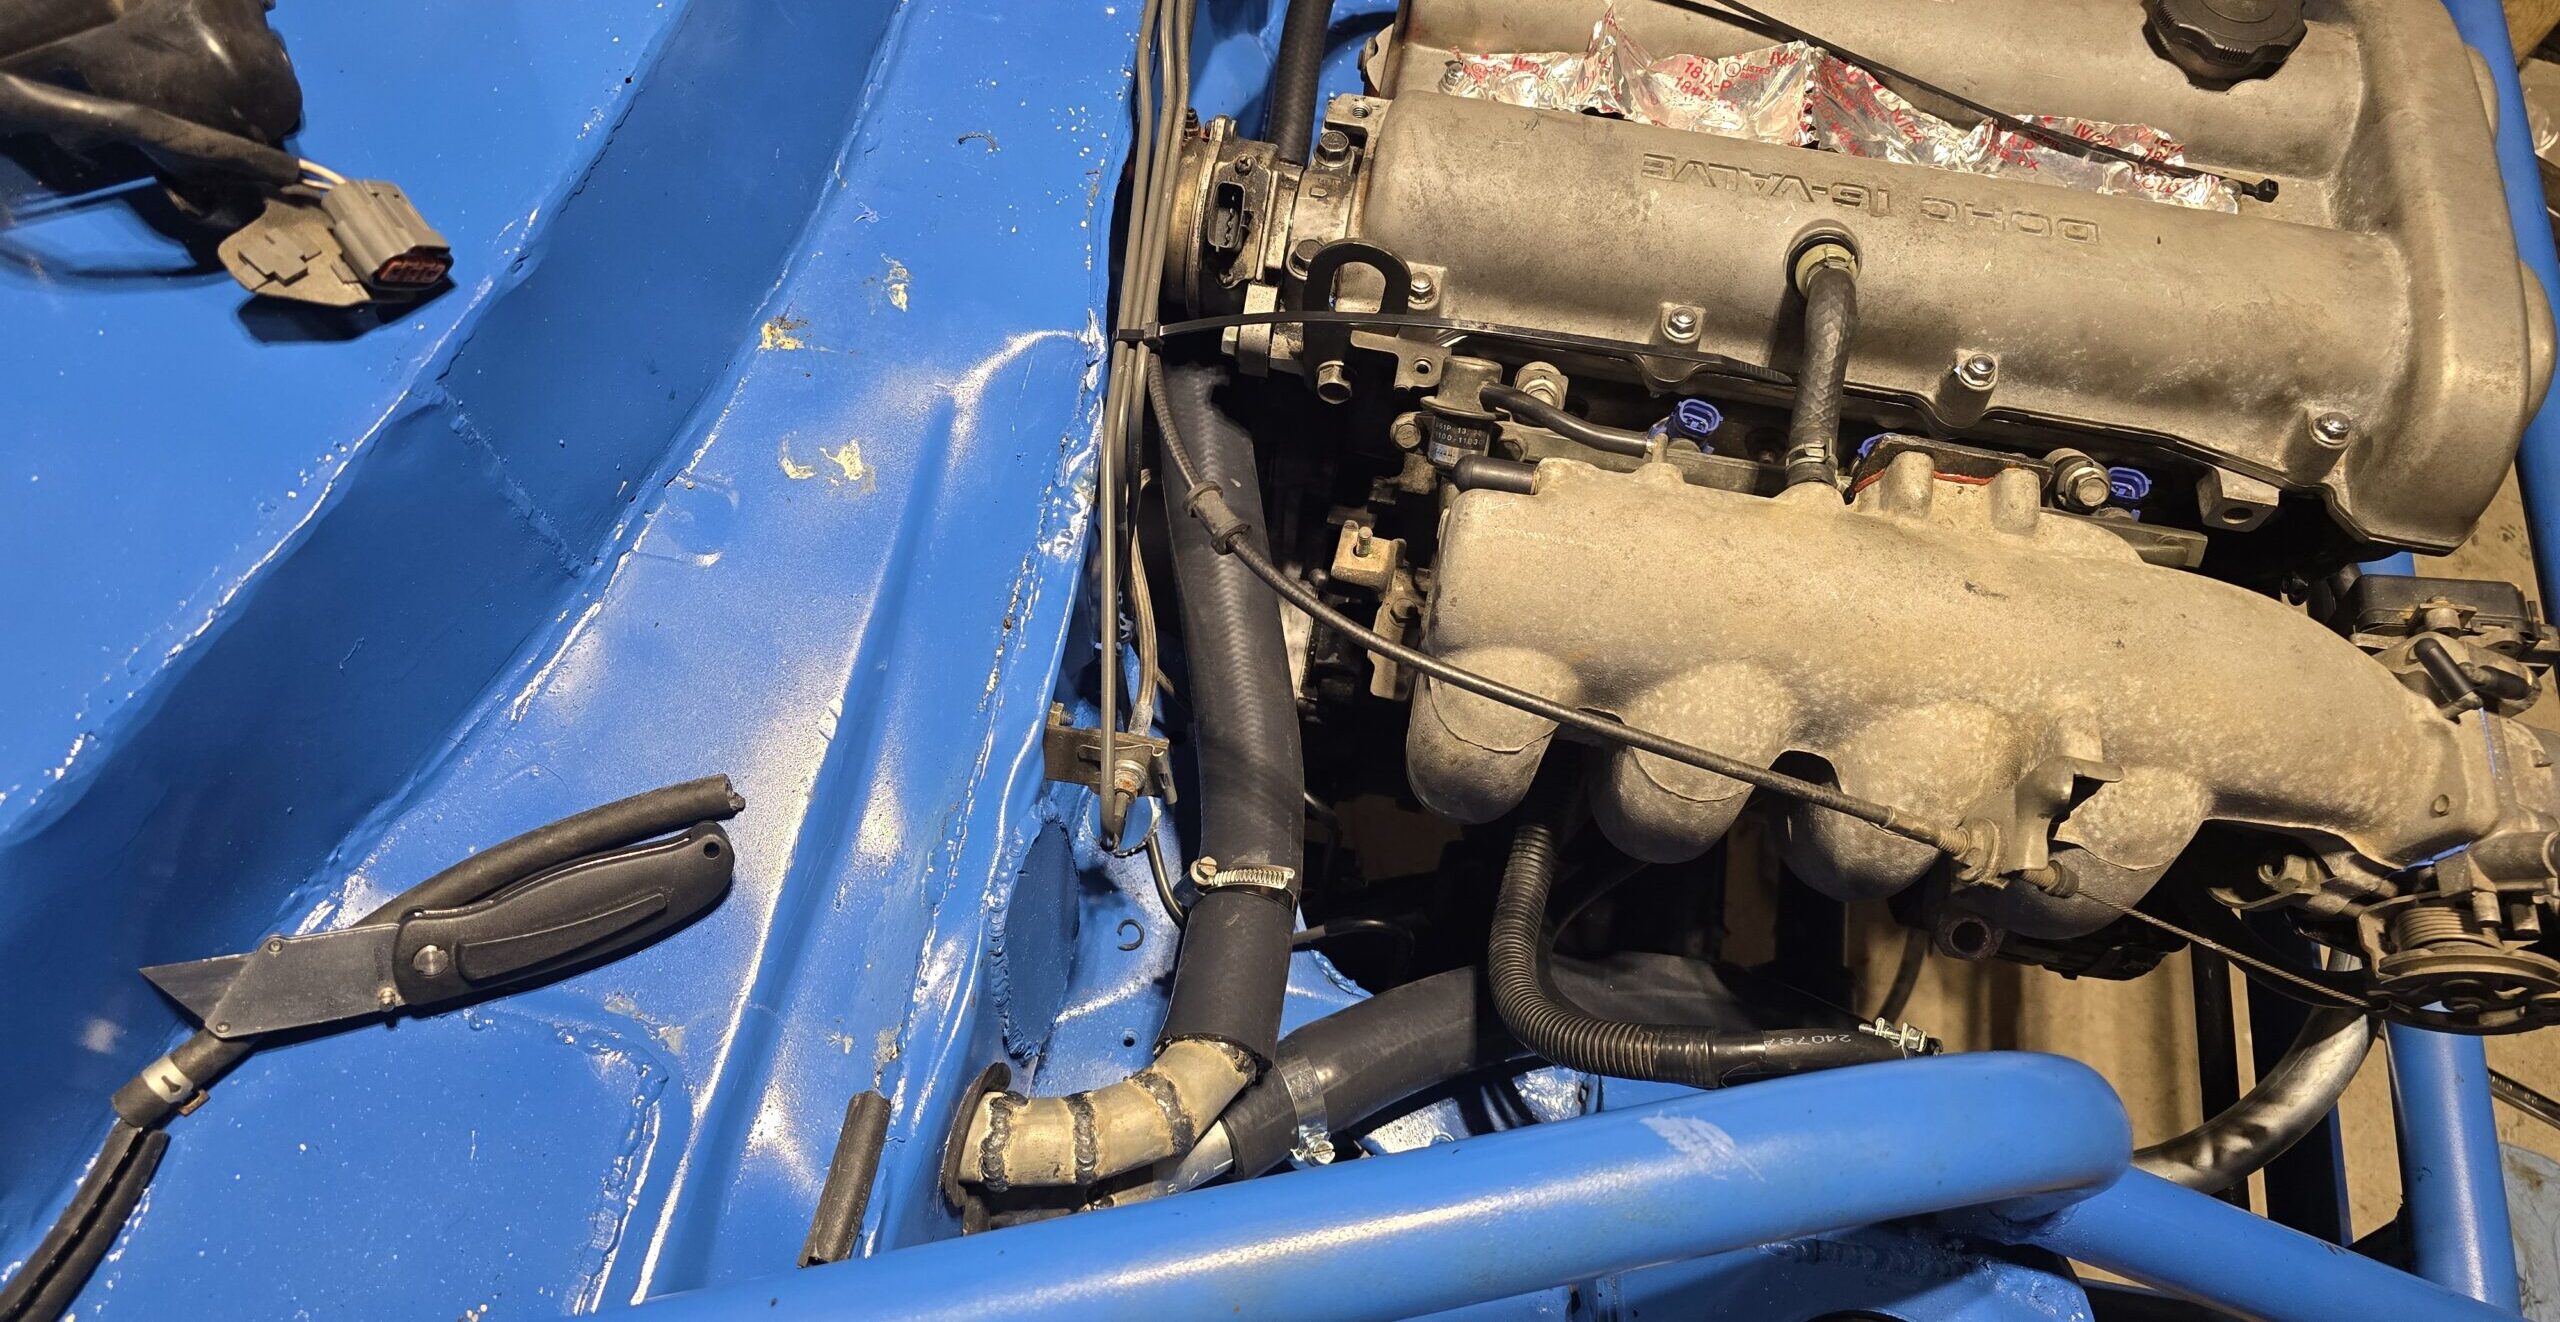
Engine Cold Side
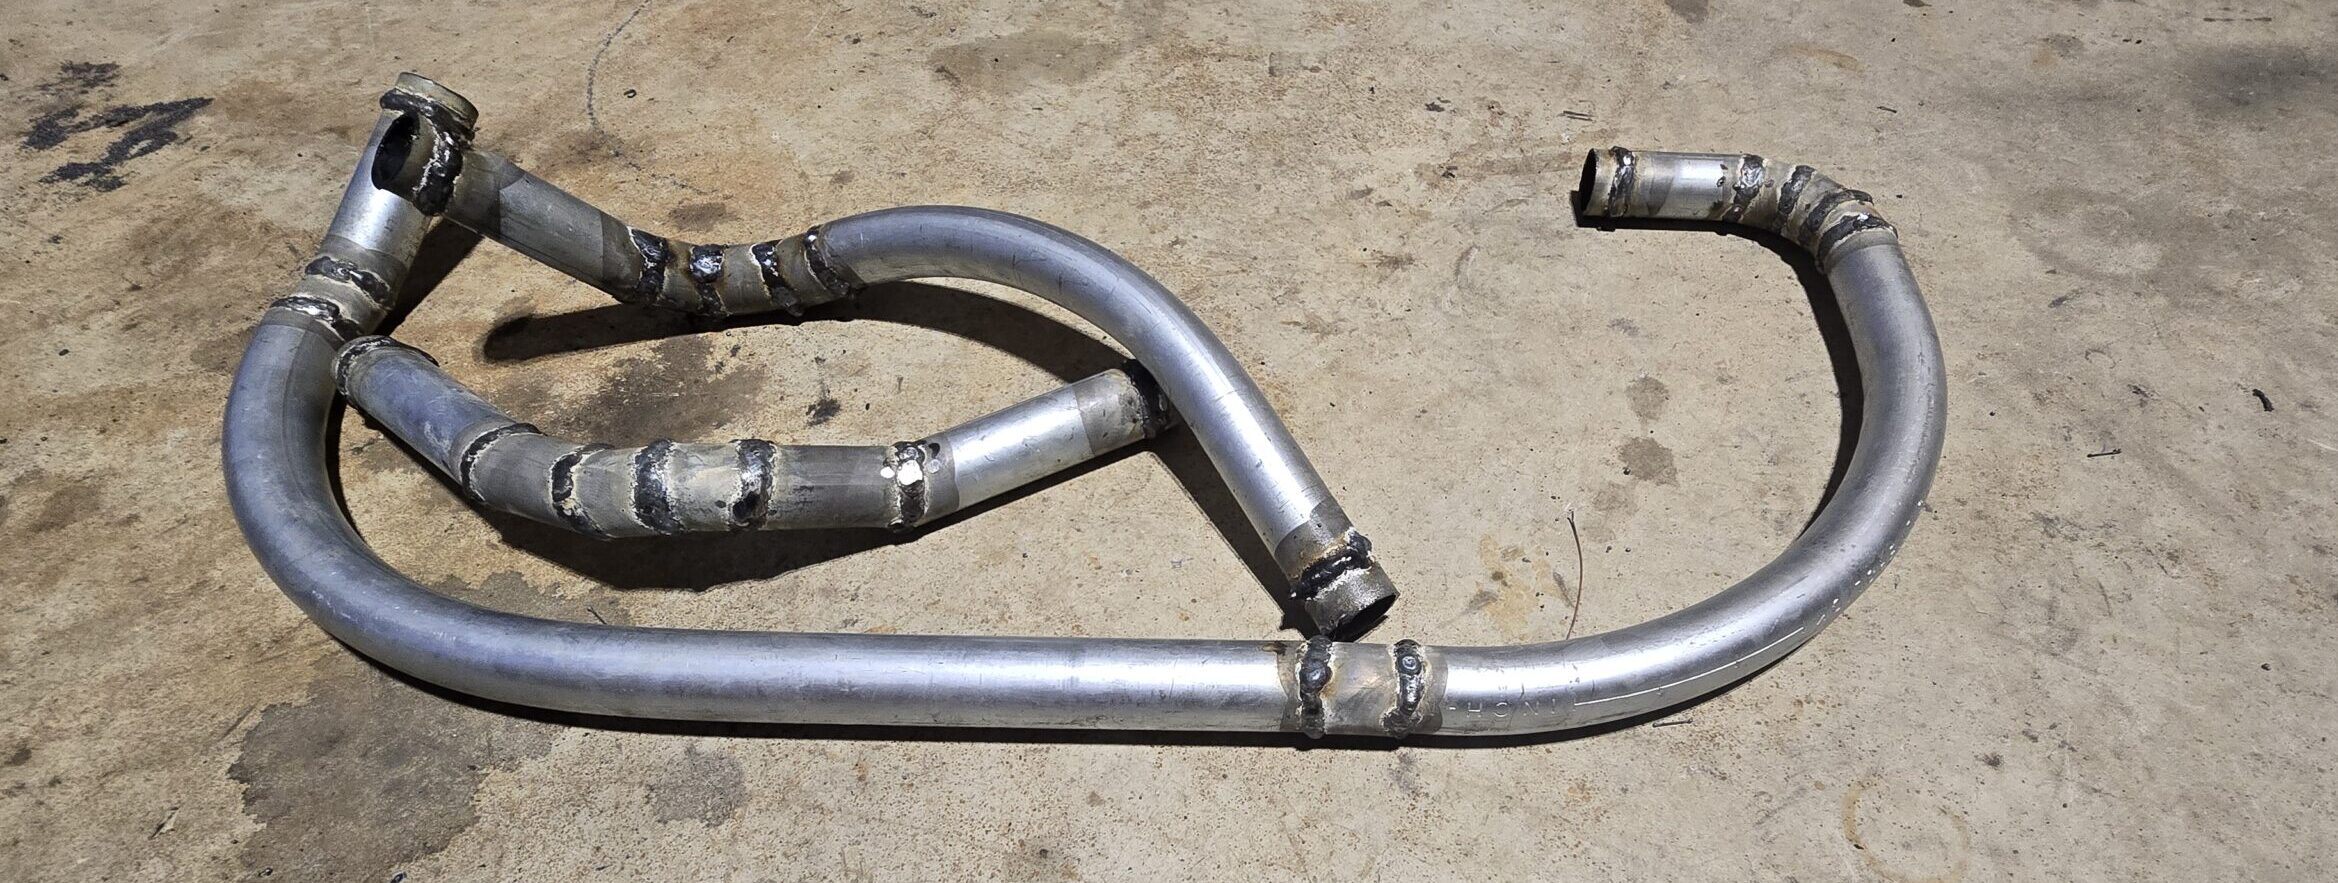
For the actual lines, I started with the cold side that enters the water pump. This line attaches to the bottom of the radiator in the factory configuration. To do this, I made a few pie cuts to weld a tight radius 90-degree bend that lined up with the water pump inlet. Then, using the conduit bending tool, I bent two larger radius 90-degree bends with a short straight run between them. Finally, the bends were welded together in the configuration below and secured to the front support.
Cold Side Thru Firewall
Now another hardline passes through the firewall and turns down toward the door sill. A silicone radiator hose connects the two pipes. This will also accommodate any engine movement.
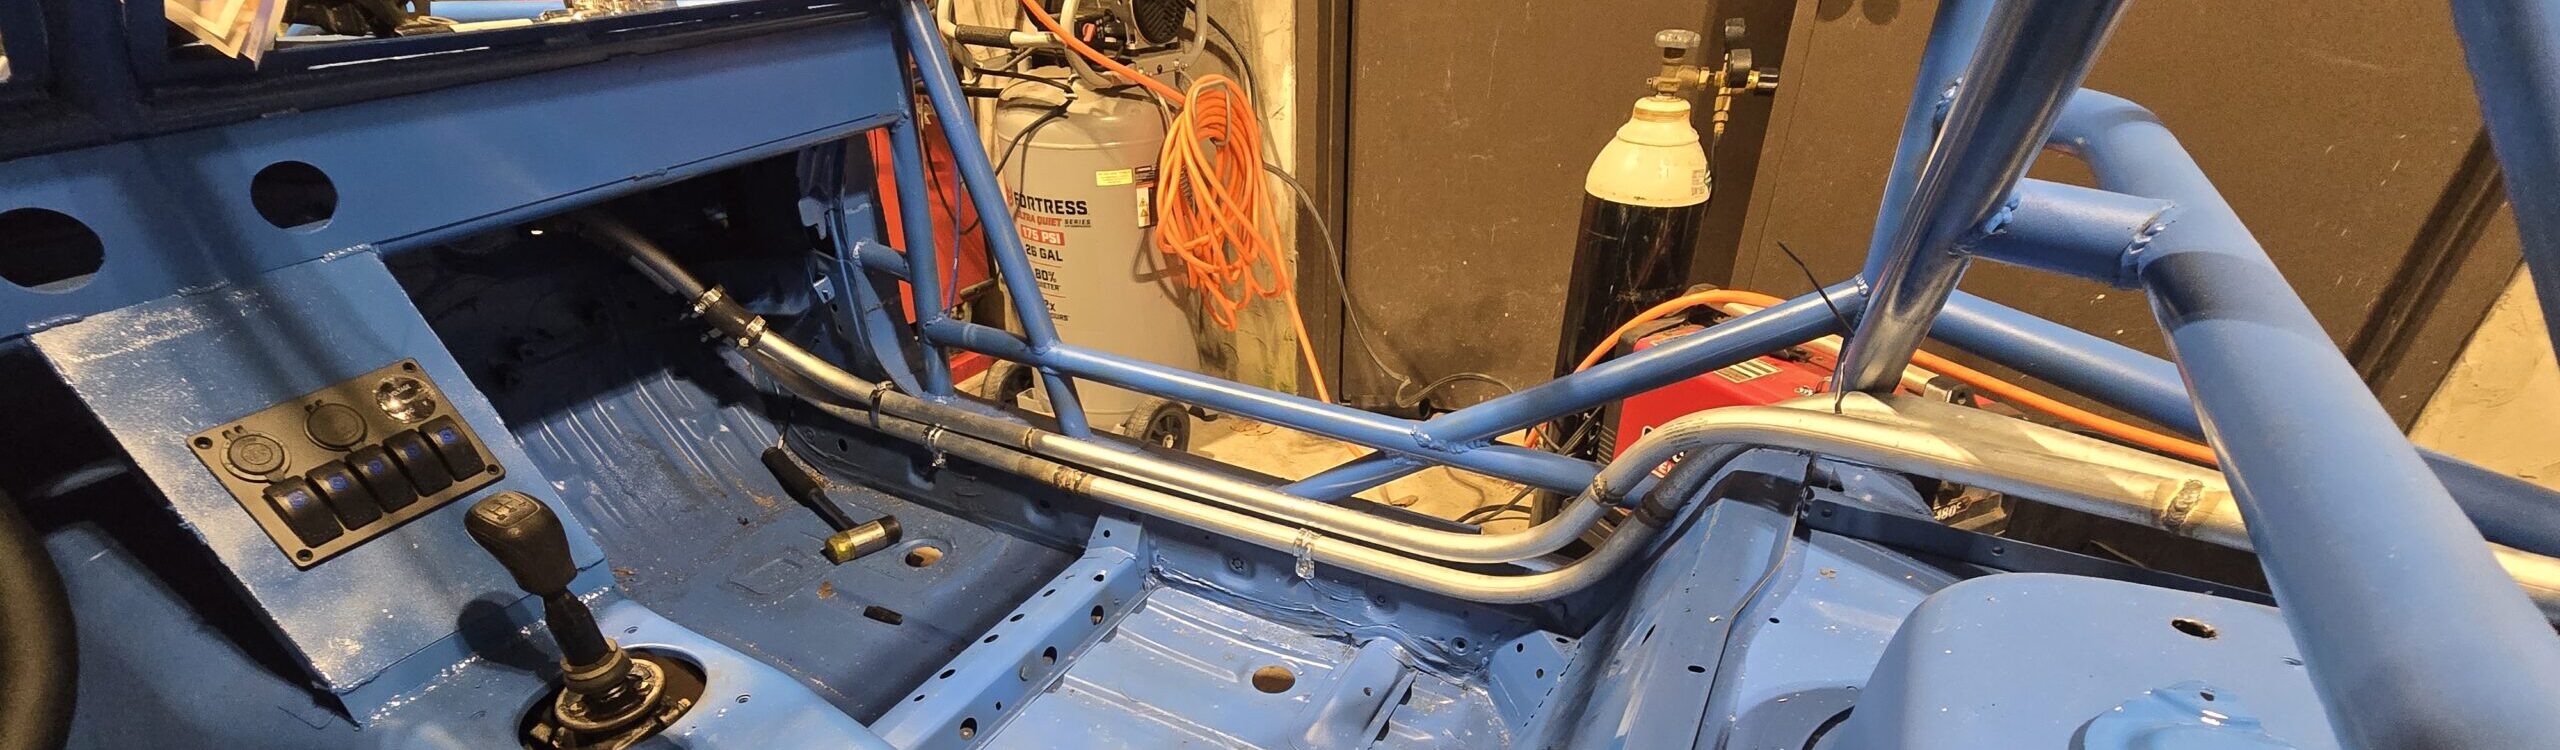
Cold Side Cockpit to Radiator
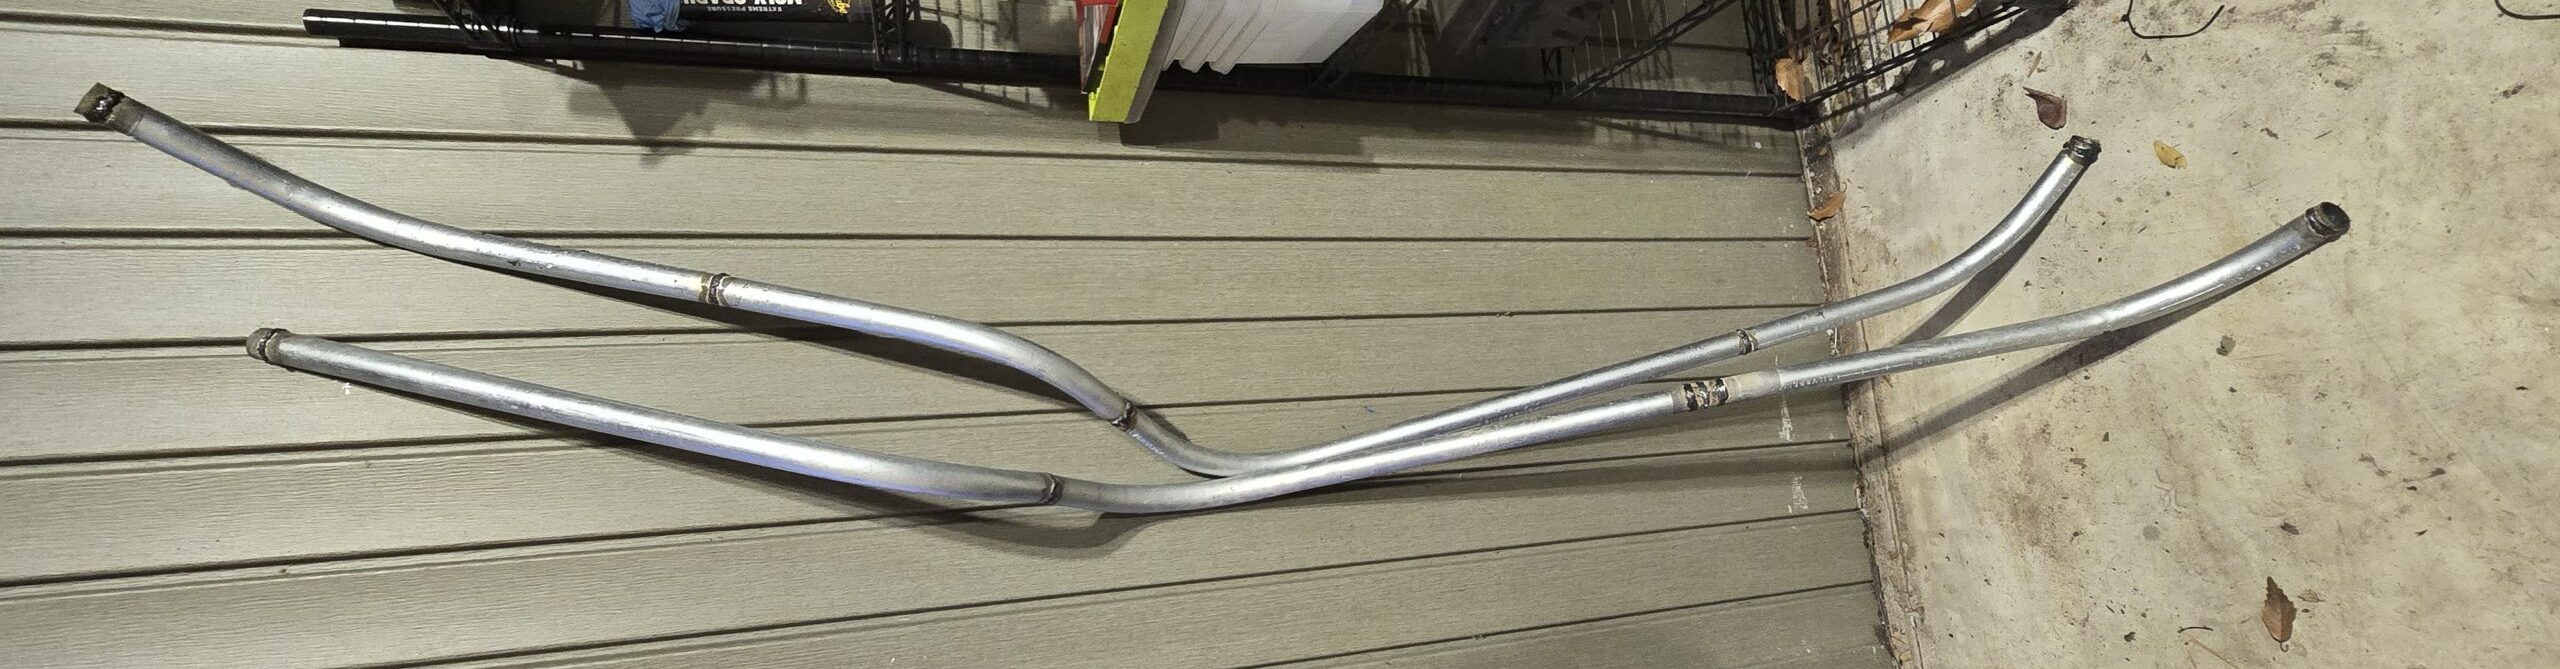
For these bends, I used the conduit bender to follow the sill as closely as possible. I welded multiple bends together to get the proper contour.
(Note: I changed the design slightly from the pic above. I originally had a joint along the sill (pictured above) but moved it up to the firewall as it prevented the hot side from laying flat.)
Engine Hot Side
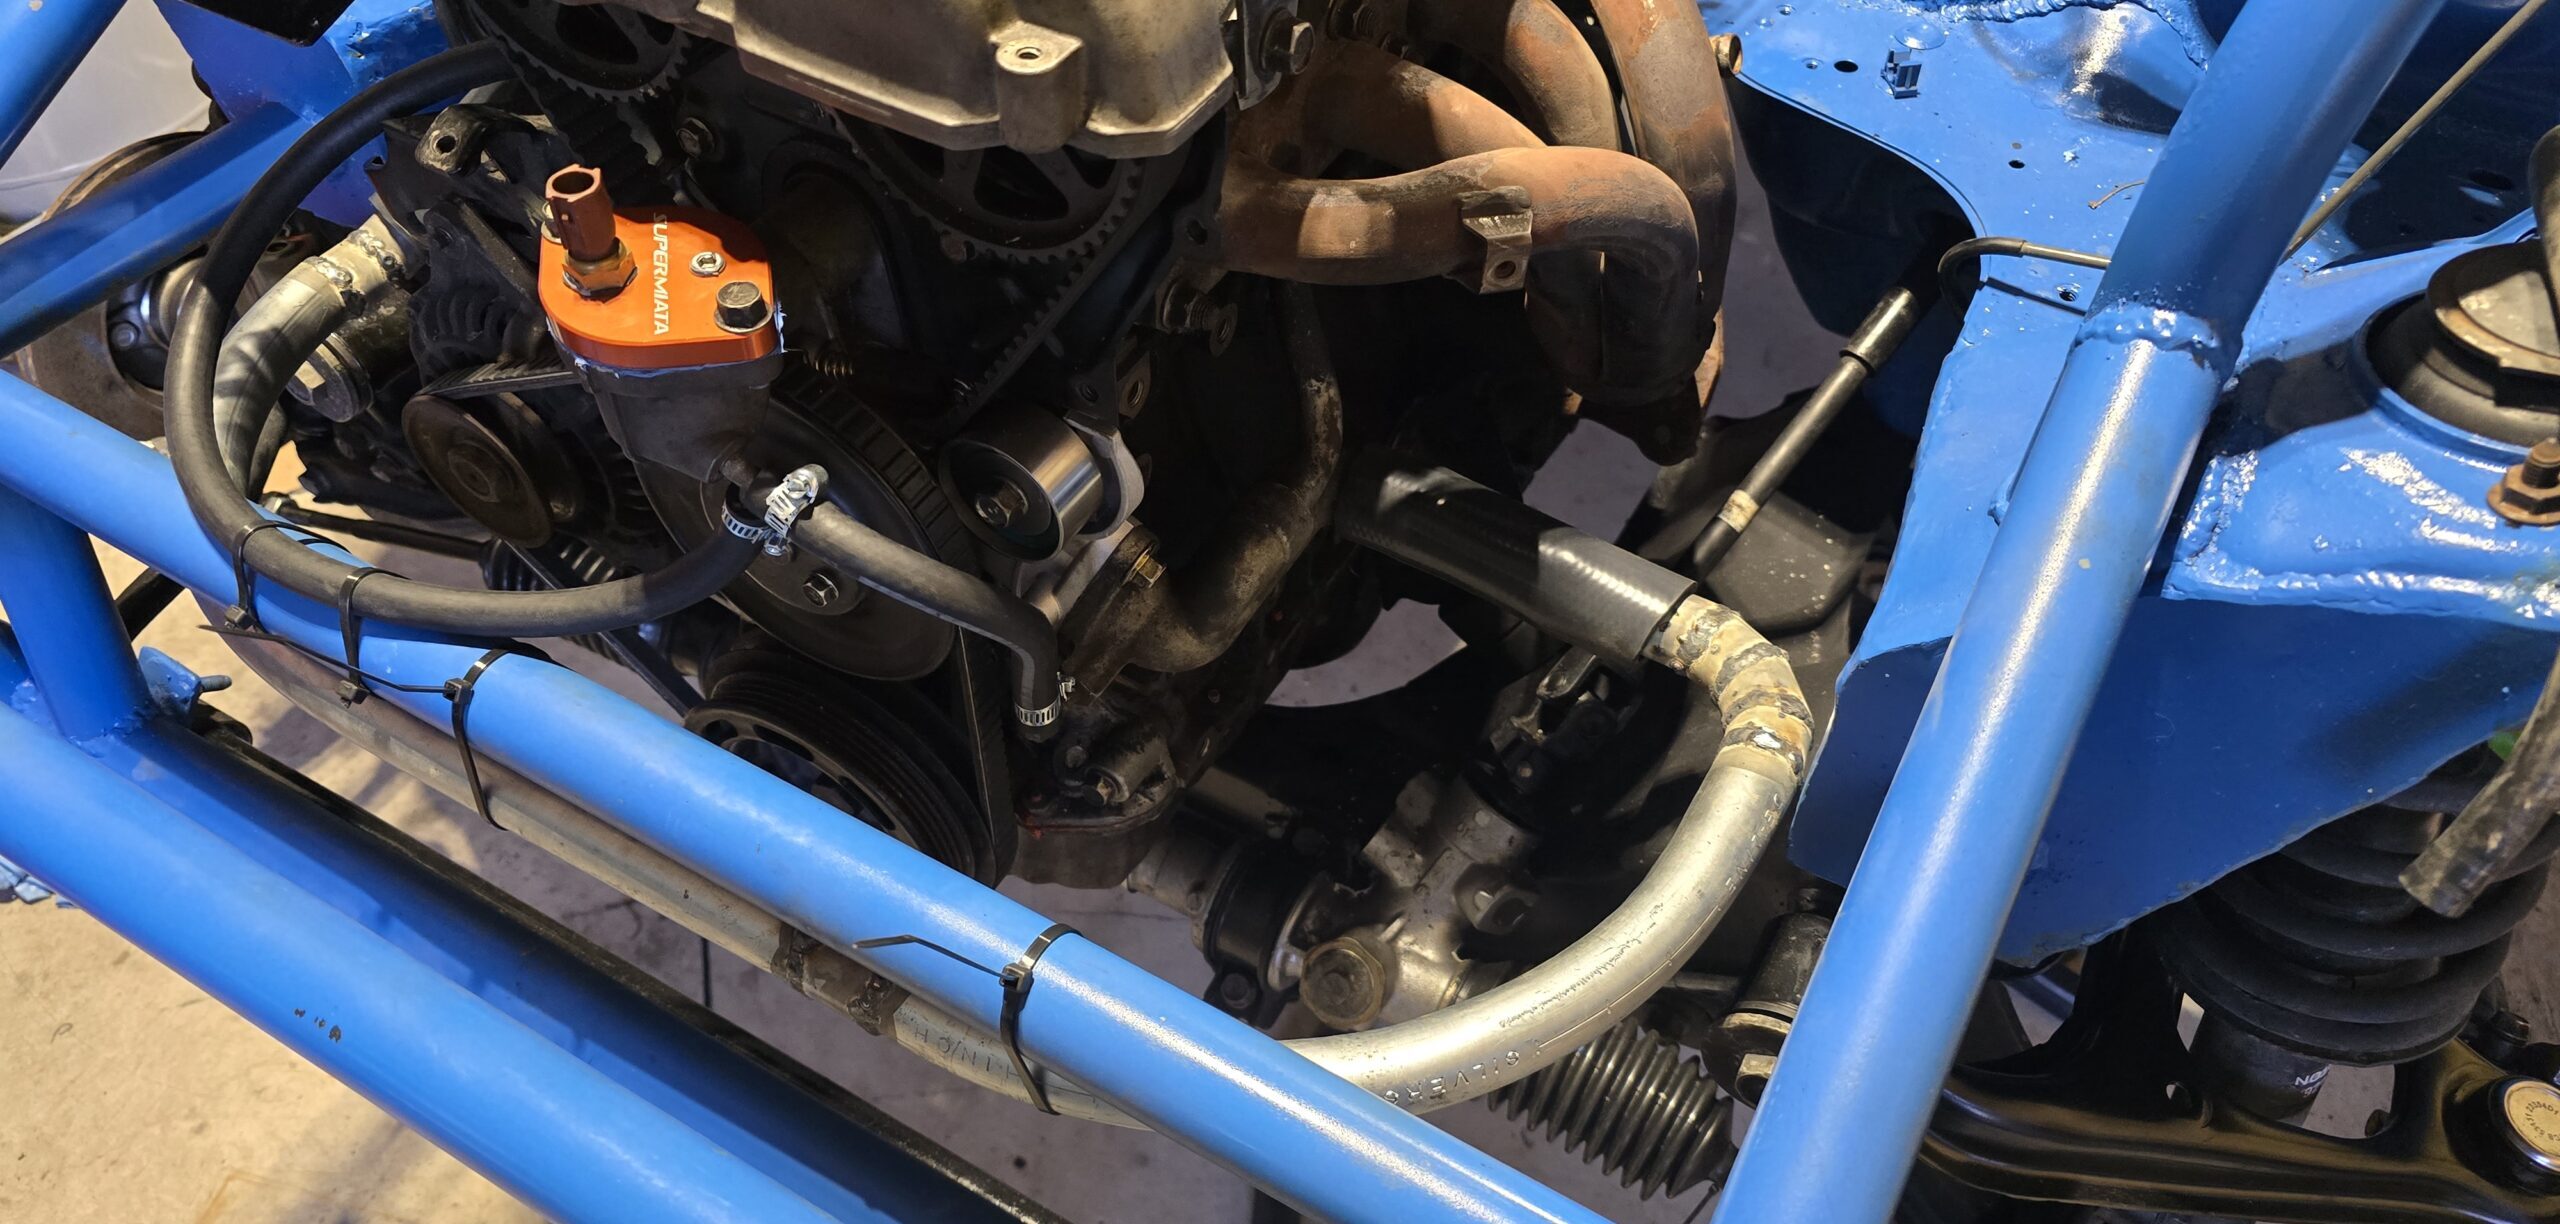
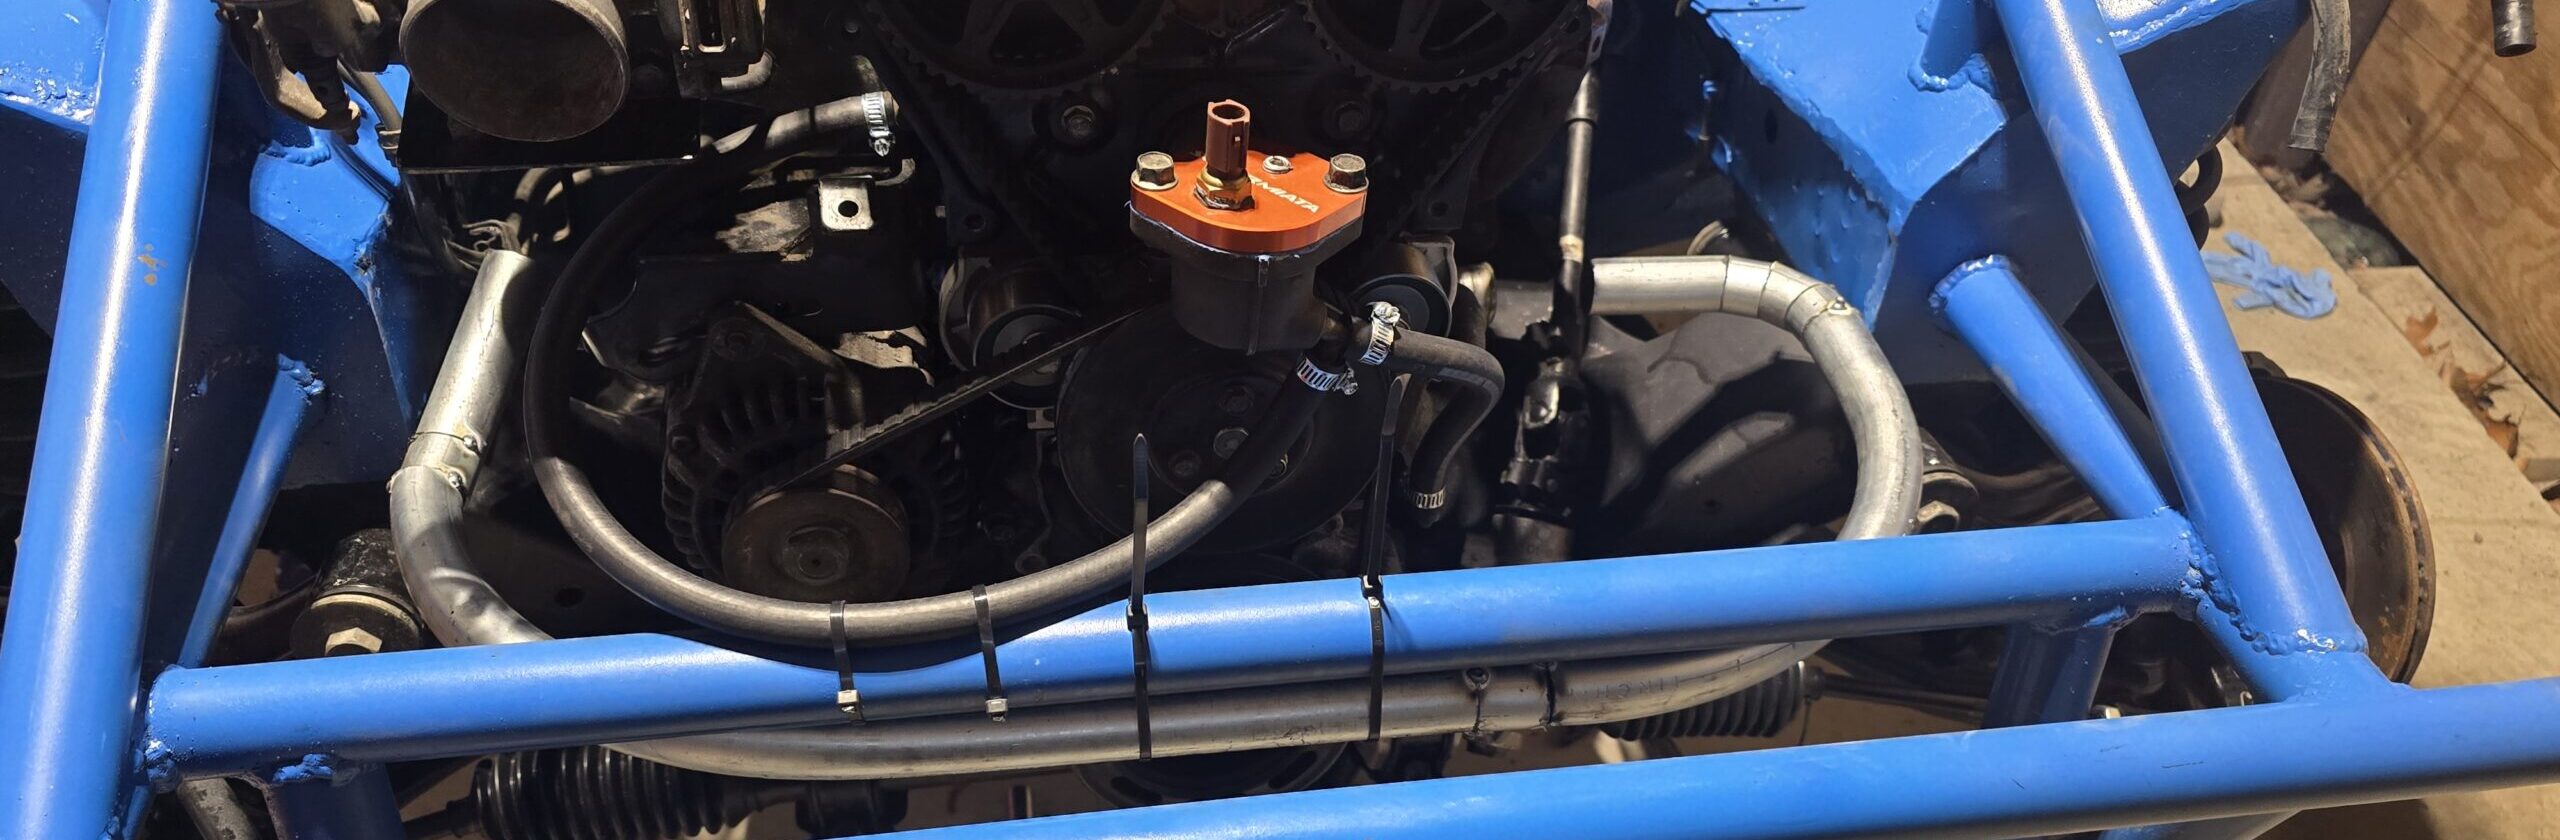
I previously ordered a SuperMiata Coolant Reroute kit that sat on the shelf for over a year. Having the hot side exit from the rear of the engine makes the routing a lot easier, so I went ahead and installed the reroute. However, in the future, I would probably fabricate my own because, although convenient, $300 is a bit steep. (It’s going to be a while before I need to fab one, but I will make sure to add a link here when I do.)
With the reroute in place, I ran a silicone line from the reroute directly to the hot side connector in the firewall. (Right above the cold side.)
Hot Side Cockpit to Radiator
There is nothing different here. This line runs as close as possible to the sill above the cold side.
Connecting to the Radiator
Both coolant lines terminate next to the radiator. The cold side will connect to the bottom port of the radiator and the hot side to the top. As such, the hot side angles upwards at the rear near the radiator. A 90-degree silicone hose is installed on each radiator port. Then, a few couplers and two short radiator hose runs connect to the lines from the cockpit. Completing the coolant loop.
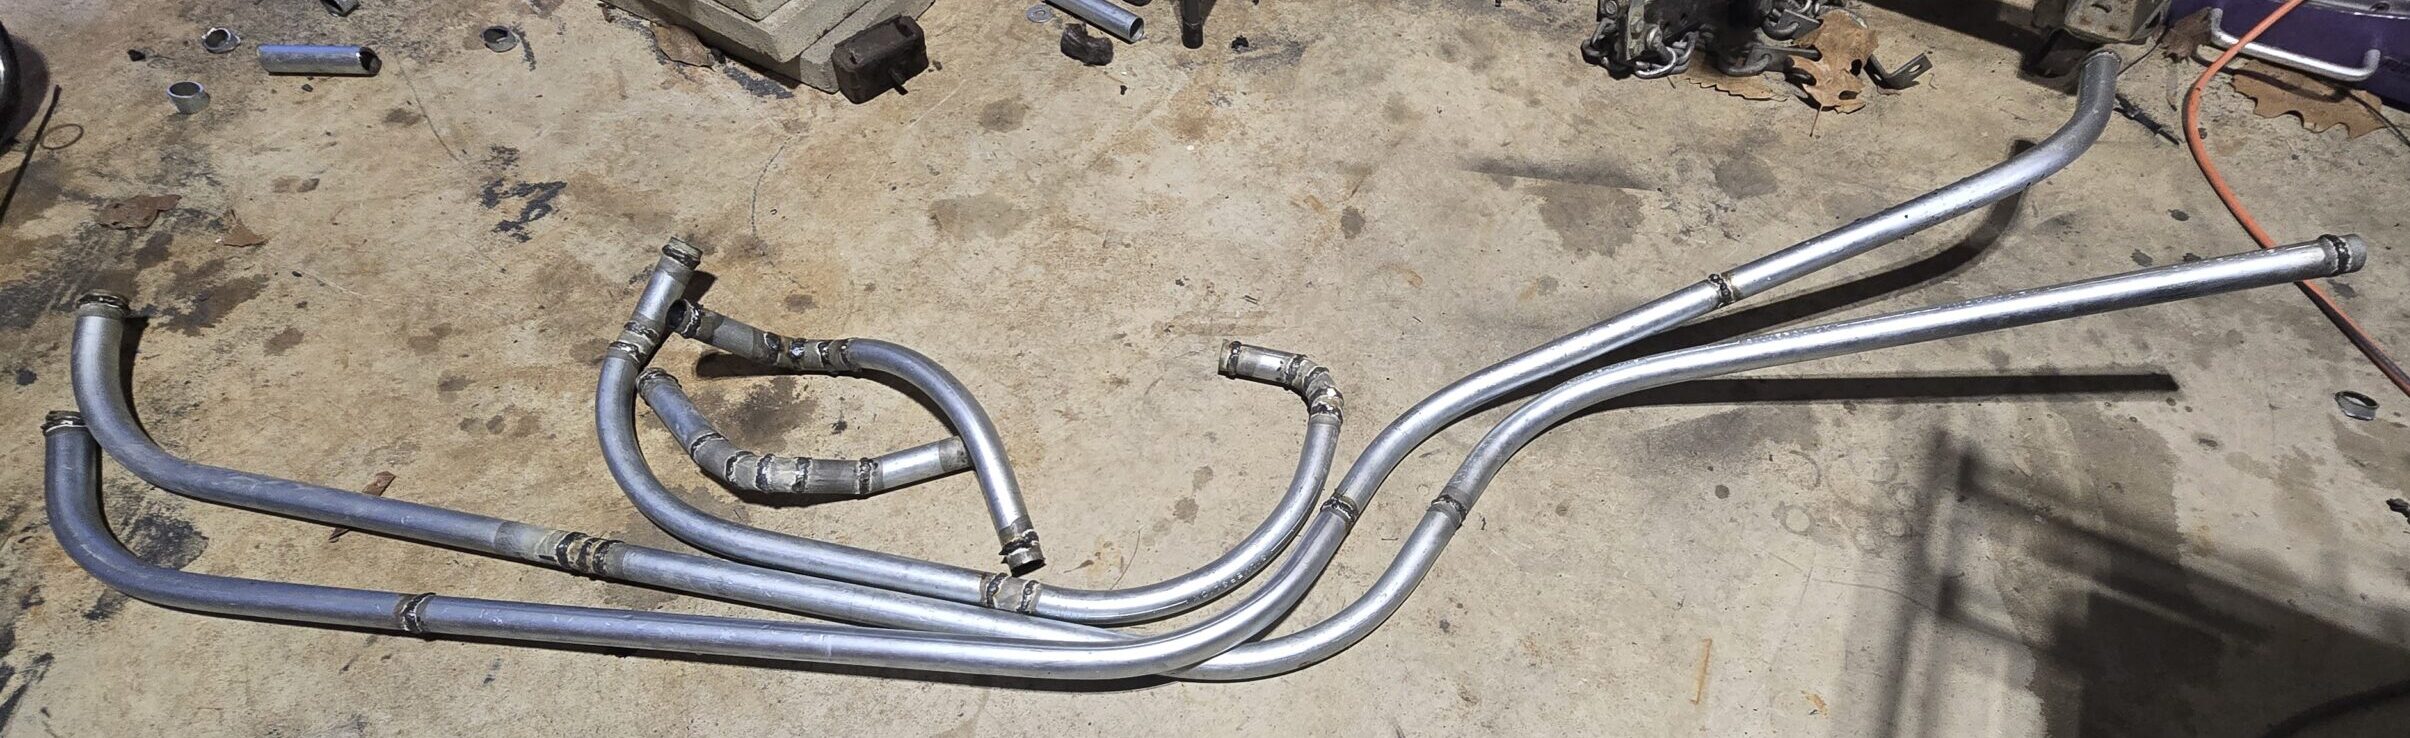
Additional Line Pics
These are for reference to view the fabricated lines outside the chassis.
Securing the Coolant Lines
When building the coolant loop, I accounted for engine movement in the front and used hose clamps to secure the silicone hoses to the hard lines. I used 1-inch EMT tube hangers for the cockpit to secure the cold line to the door sill firmly. The hot side is secured to the cold side with a few hose clamps. These lines aren’t going anywhere. Finally, hose clamps are used in the rear to complete the final connections to the radiator.
(Note: Outside the test environment, I will probably tack weld the hard lines to the chassis.)
Finishing Up and Other Considerations
I pressure-tested the lines I fabricated to 60 psi using a custom hose mount and plug. All of the lines are watertight, but I won’t have a chance to test the car for another week or two. So, I will come back with a bit more info, like what I use for an expansion tank and driving impressions.
Also, I didn’t mention it above but the radiator fan will play a very important ro