Related Links
- MR2 Spyder Power Steering Removal (Part 1: Try Before You Buy)
- MR2 Spyder Power Steering Removal (Part 2: The Vented Surge Box)
- MR2 Spyder Power Steering Removal (Part 3: Disabling the P/S Warning Light)
- MR2 Spyder Power Steering Removal (Part 4: Summary and Final Install)
- MR2 Spyder Power Steering Removal (Appendix: Alternate Install)

You’d be hard pressed to purchase a car without power steering and the Spyder is no exception. Power steering is the “marvel of engineering” that the average commuter simply can’t live without. And for good reason too! With the current crop of cars sporting an average weight well in excess of 4000 lbs, the front wheels are quite cumbersome to turn without assistance. The Spyder, however, is considered a featherweight by comparison and although most driver’s will enjoy their power steering, a few of us will ditch it for increased road feel, easier control and a slight weight reduction.
This article will demonstrate a basic, bare minimum process to converting the MR2 Spyder to manual steering. This method has been used by DIY tuners for years. Part 2 will show the build of the air and pressure burp tank that further improves steering.
A Brief Background
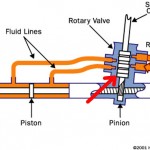
Before delving into this guide, I want to offer a brief description of a power steering system. This will help in the later parts that deal with the vented surge box and minimizing the components necessary for a reliable manual steering system on the Spyder. As shown in the image below, pressurized power steering fluid enters the rack where the rack and steering column join. In this compartment, there is a rotating valve assembly (arrow in picture) that directs the pressurized fluid to the rack through one of two lines or back to the fluid reservoir through the return line. The valve sends fluid to one side of the rack when the wheel is turned. This moves a piston in the rack and in turn assists in moving the wheels. The side of the rack not receiving the pressure has fluid forced back into the valve compartment and ultimately to the return as the piston moves. In this manner, the fluid is recirculated to the pump. (Check out this article for a more detailed explanation: How Car Steering Works)
Try Before you Buy
One neat feature of the Spyder’s power steering system is that you can actually turn the assist off without removing the pump. Since the pump is a non belt driven electric unit located in the front of the car, you can simply unplug the unit, remove the p/s fuses or turn the car off and then back on while in 1st gear rolling at less than 5 miles per hour. All three of these methods will disable the pump and you can drive your Spyder without p/s. Also note, this test is an approximation of the feel as the amount of effort required to turn will reduce slightly once the pump is removed from the system.
Method 3 Explanation: To perform method three, start the car and then begin to drive very slowly in 1st gear. Then press the clutch down, move the shifter to neutral and remove the ignition key. While still rolling, place the ignition key back in and then start the car. If the starter catches, you will notice that the p/s light is now lit on the gauge cluster and that the steering is non-assisted.
The Procedure
Now on to the good stuff.
First, locate the power steering pump. In the image below, I have already removed the front trim from the frunk (front trunk) to expose the whole pump. (The trim was held in place by pop rivets.) Go ahead and remove the 3 plugs from the bottom of the pump.

Now, we need to drain the excess fluid from the p/s reservoir and remove the pump. To drain the reservoir, you can either siphon the fluid out from the top or disconnect the pump from the frame and tilt the fluid out into a container. I chose the latter and used a container and funnel to collect the fluid. Also note that I removed the spare tire and tub to allow enough tilt. (The tub is held to the car by 4 10mm bolts on its inside.)

Using a 10mm wrench, disconnect the pump from the frame at these points (arrows).
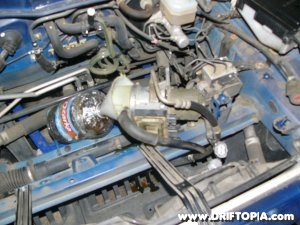
With the fill cap removed from the reservoir, I tilted the unit over into a funnel and let the fluid drain out.
At this point, place the pump back in place and remove the two lines from the unit. The rubber line if held on by a simple clip and the lower, hard line threads into the side. Once both lines are removed, go ahead and pull the pump out and set it aside.
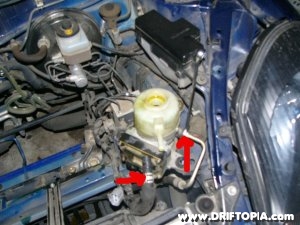
Once drained, remove these two lines (arrows) from the pump.

The power steering pump removed.
Next, the two lines that were just disconnected from the pump need to be connected to each other. Since this is part 1, I am showing the easiest and quickest manner to achieve this. Take the threaded line and slide the threaded fitting back on the line, exposing the rounded lip. Now slide the rubber hose over the metal lip and clamp the hose to the metal line with the clip that held the rubber hose to the reservoir. With the two lines joined, go ahead and zip tie the lines securely in place. (I tied mine to the bracket that held the pump.)

Connect the lines as shown and then zip tie the lines to the brackets. (arrows)
Finally, wrap the three p/s plug ends in electrical tape to protect them in the event that you want to reinstall p/s and then zip tie then to the side.

Bundle and wrap the loose plugs with electrical tape for protection.

Tuck and secure the wrapped plugs.
Driving Impressions
As I said earlier, this mod may not be for everyone. From a standstill, turning the wheel takes effort (as any manual steering car would) but it is no strain compared to other non-assisted cars I have driven. This is largely due to the low weight over the front tires inherent in the mid-engine design. Now for the good news. At anything over 5mph, the car feels much more stable and the feedback is phenomenal. When taking aggressive turns, oversteer is easily managed as I am now no longer fighting the sometimes neurotic and over reactive power steering. Of particular note, with the added feedback the car now provides, rainy conditions are no longer wrought with a vague feeling in the rear. Instead, the car always seems to beg for more until the limit of adhesion is approached. Surprisingly, that limit approaches in a much more linear fashion so snap-oversteer would now take a conscious effort to induce.
That’s it for part 1. Part two will focus on pressure bleeding which will make the steering even more responsive. Till then.
Gallery
Related Links
- MR2 Spyder Power Steering Removal (Part 1: Try Before You Buy)
- MR2 Spyder Power Steering Removal (Part 2: The Vented Surge Box)
- MR2 Spyder Power Steering Removal (Part 3: Disabling the P/S Warning Light)
- MR2 Spyder Power Steering Removal (Part 4: Summary and Final Install)
- MR2 Spyder Power Steering Removal (Appendix: Alternate Install)


