After the recent turbo actuator failure on the Ram 2500, I figure I may as well go ahead and make a few changes to the 6.7 Cummins. Changes like installing the Fleece High Flow grid heater delete. But unlike other options that replace the intake plenum and manifold, the Fleece unit replaces only the plenum plate, significantly reducing the cost of this modification.
What is the Grid Heater and Why Delete It?
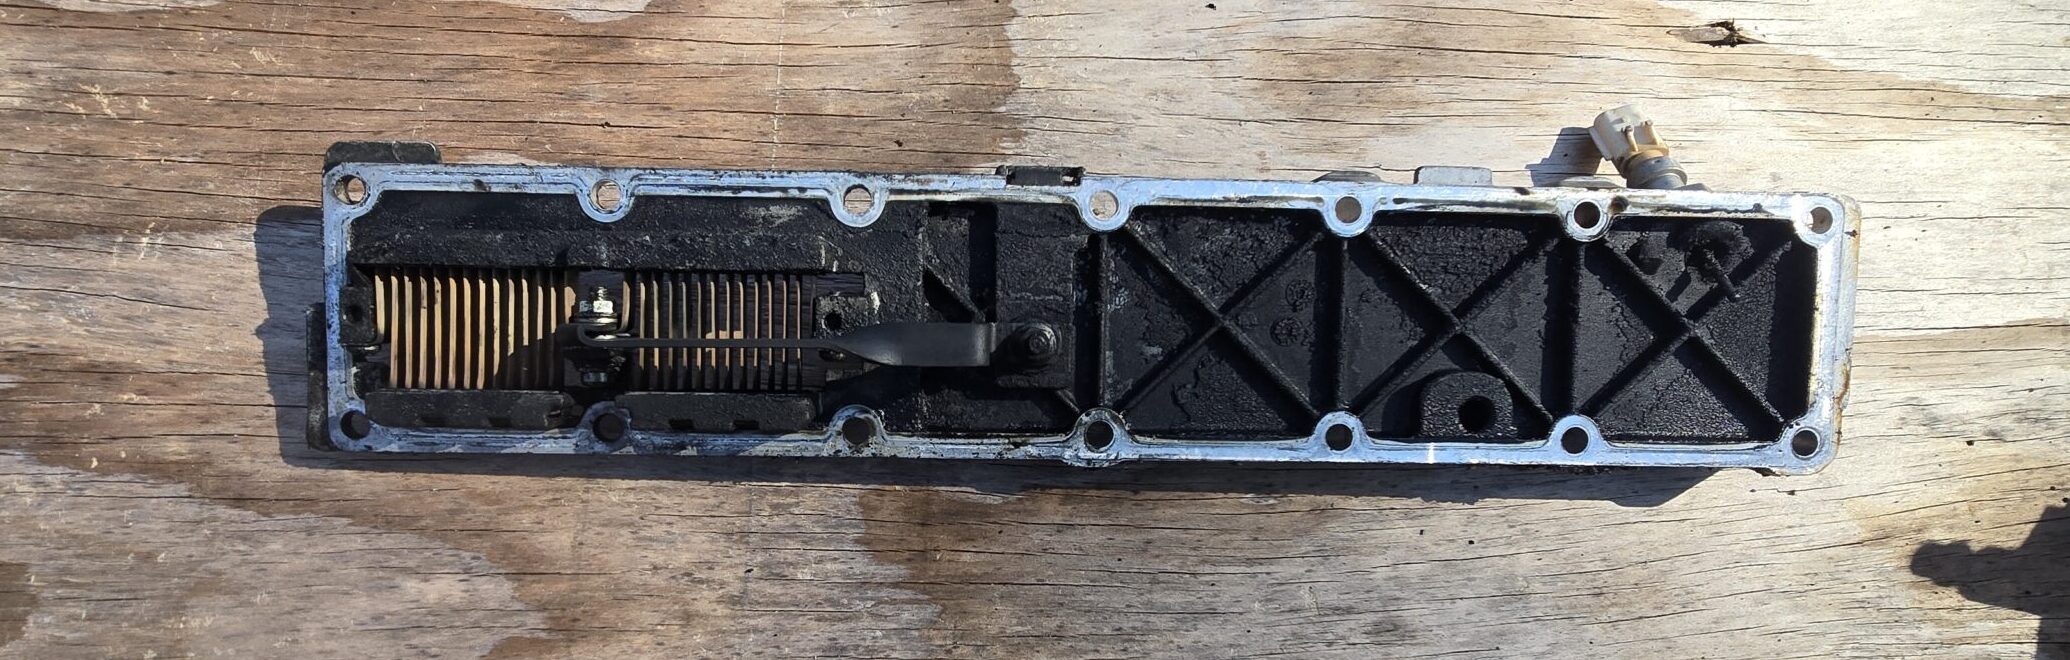
On the 4th- and 5th-gen Ram 2500 and 3500 trucks, a grid heater is installed in the intake plenum plate. This row of plates is energized with up to 200 amps during startup to heat the air before it enters the cylinders. And although this system is active when temperatures are below 66 degrees Fahrenheit, the real purpose of the grid heater is to aid in cold starts. Think temps in the teens when diesel engines can have trouble starting.
However, there is a small design issue with the factory grid heater. Specifically, there is a nut that secures a metal bus bar to a main electrical stud. Over time, since this bar is energized during almost every cold start, the nut can degrade through arcing or simply vibrate loose. And since this nut is inside the intake path, the failure mode is catastrophic. It will get sucked into one of the cylinders. Usually, cylinder #6. And as I have come to find, repairs on these engines are very, very expensive.

Is the Grid Heater Delete Necessary?
Now we know the what and why, but is the delete necessary? I’m going to be honest, there is a reason that this mod sat on the shelf for 2 years. Namely, there is almost a zero percent chance that the dreaded grid heater failure will happen to you or anyone you know, for that matter. But there is still a very small chance.
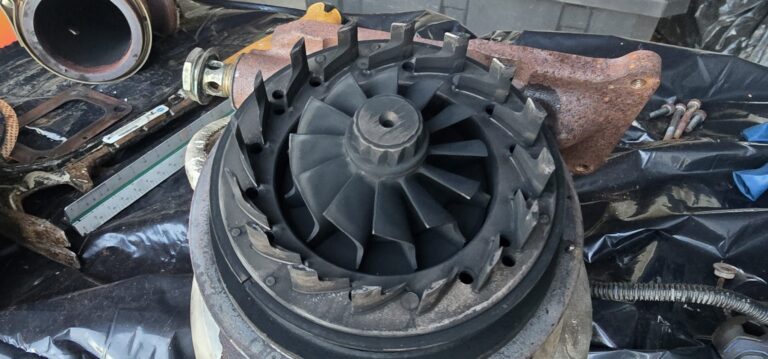
Also, I am always interested in easy, inexpensive efficiency gains on my vehicles, and as you can see in the pics, the grid is definitely a bottleneck in the intake path.
Delete vs Replace the Grid Heater
Finally, before we jump to the install, I want to point out that there are two ways to remove the factory grid heater. Since I live in the south and only use my truck for truck activities and towing, I don’t need the heater. My truck will rarely, if ever, need to start below 20 degrees. So, for my purposes, I am using the Fleece plenum plate as a grid delete. This is a plate without the heater grid, meaning I will lose the heater functionality altogether.
On the other hand, if you want to keep the grid heater functionality, you can install an aftermarket heater. Banks has a complete kit that includes a failsafe heater and air horn. They were also the first to ‘raise the alarm’ regarding the factory system. Some of you may recall their marketing campaign a few years ago that had us all convinced our engines were going to grenade any minute.
Grid Heater Delete Resources
Now let’s get to work. No point in reinventing the wheel here. I found a ton of YouTube videos on the topic, and, as usual, they make it seem way easier than it is for a first-timer. So I am going to link one or two videos I found helpful, and then talk about the process with notes. With the notes focusing on the little ‘gotchas’ that the videos tend to ignore. But in the end, this is a very straightforward and easy process if you use a little common sense.
Up first, this video does a good job of explaining what’s what around the grid heater and then walking through the reinstall process. This one also includes the EGR install, which a lot of guides are missing.,
And one more. This one is a start-to-finish delete that better aligns with my truck configuration. (Non EGR) However, he replaces the factory air horn with an aftermarket unit. I will be retaining the factory unit.
The Removal Process and Notes
As you can see from the videos, the process is very straightforward. Here is a checklist with a few notes to help you avoid some of my mistakes.
- A few electrical connectors are mentioned in the videos. Disconnect them from the intake horn, around the plenum, the valve cover, and the fuel rail.
- Remove the fuel line noise cover. (This is a PITA to remove, and you will know very quickly if you missed a connector. I didn’t plan on reinstalling it, so I cut it in half with scissors to aid removal.)
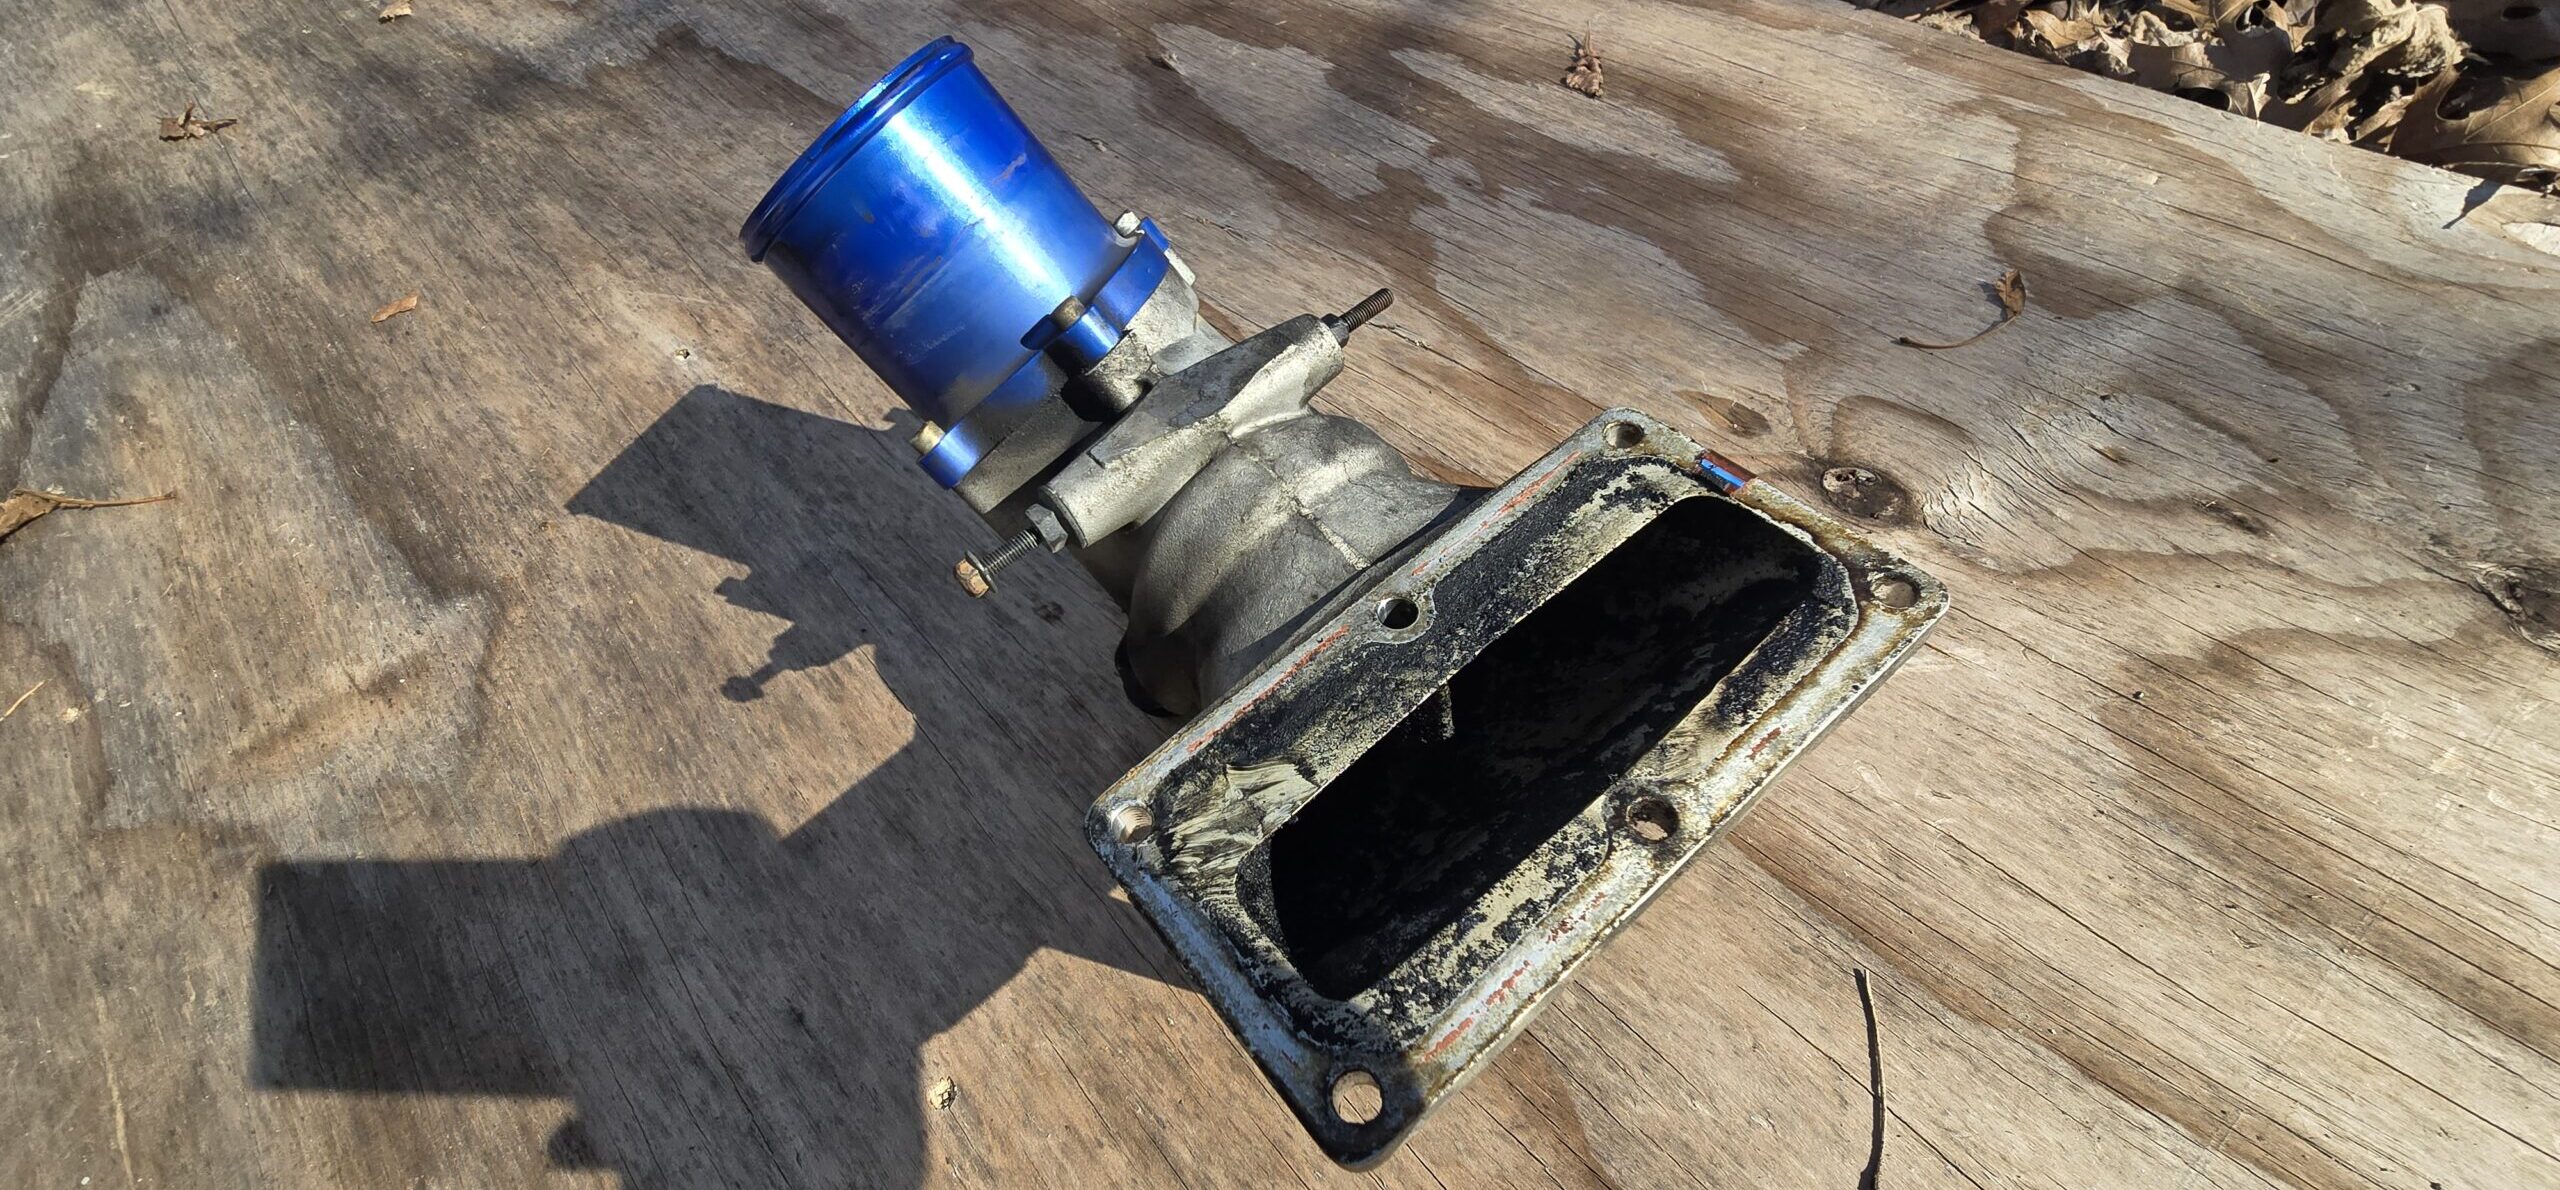
- Remove the air horn. 6 bolts at the plenum and one clamp at the intercooler tube.
- Remove the first 5 of the 6 fuel lines from the fuel rail and head. (The 6th line at the back of the head is difficult to remove from the head and only has to be removed from the rail. There is enough play when remounting the rail during reinstall to make complete removal unnecessary. Saving a lot of time.)
- Remove the banjo bolt from the fuel rail supply line. (Do not drop the washers!)
- Remove the fuel rail.
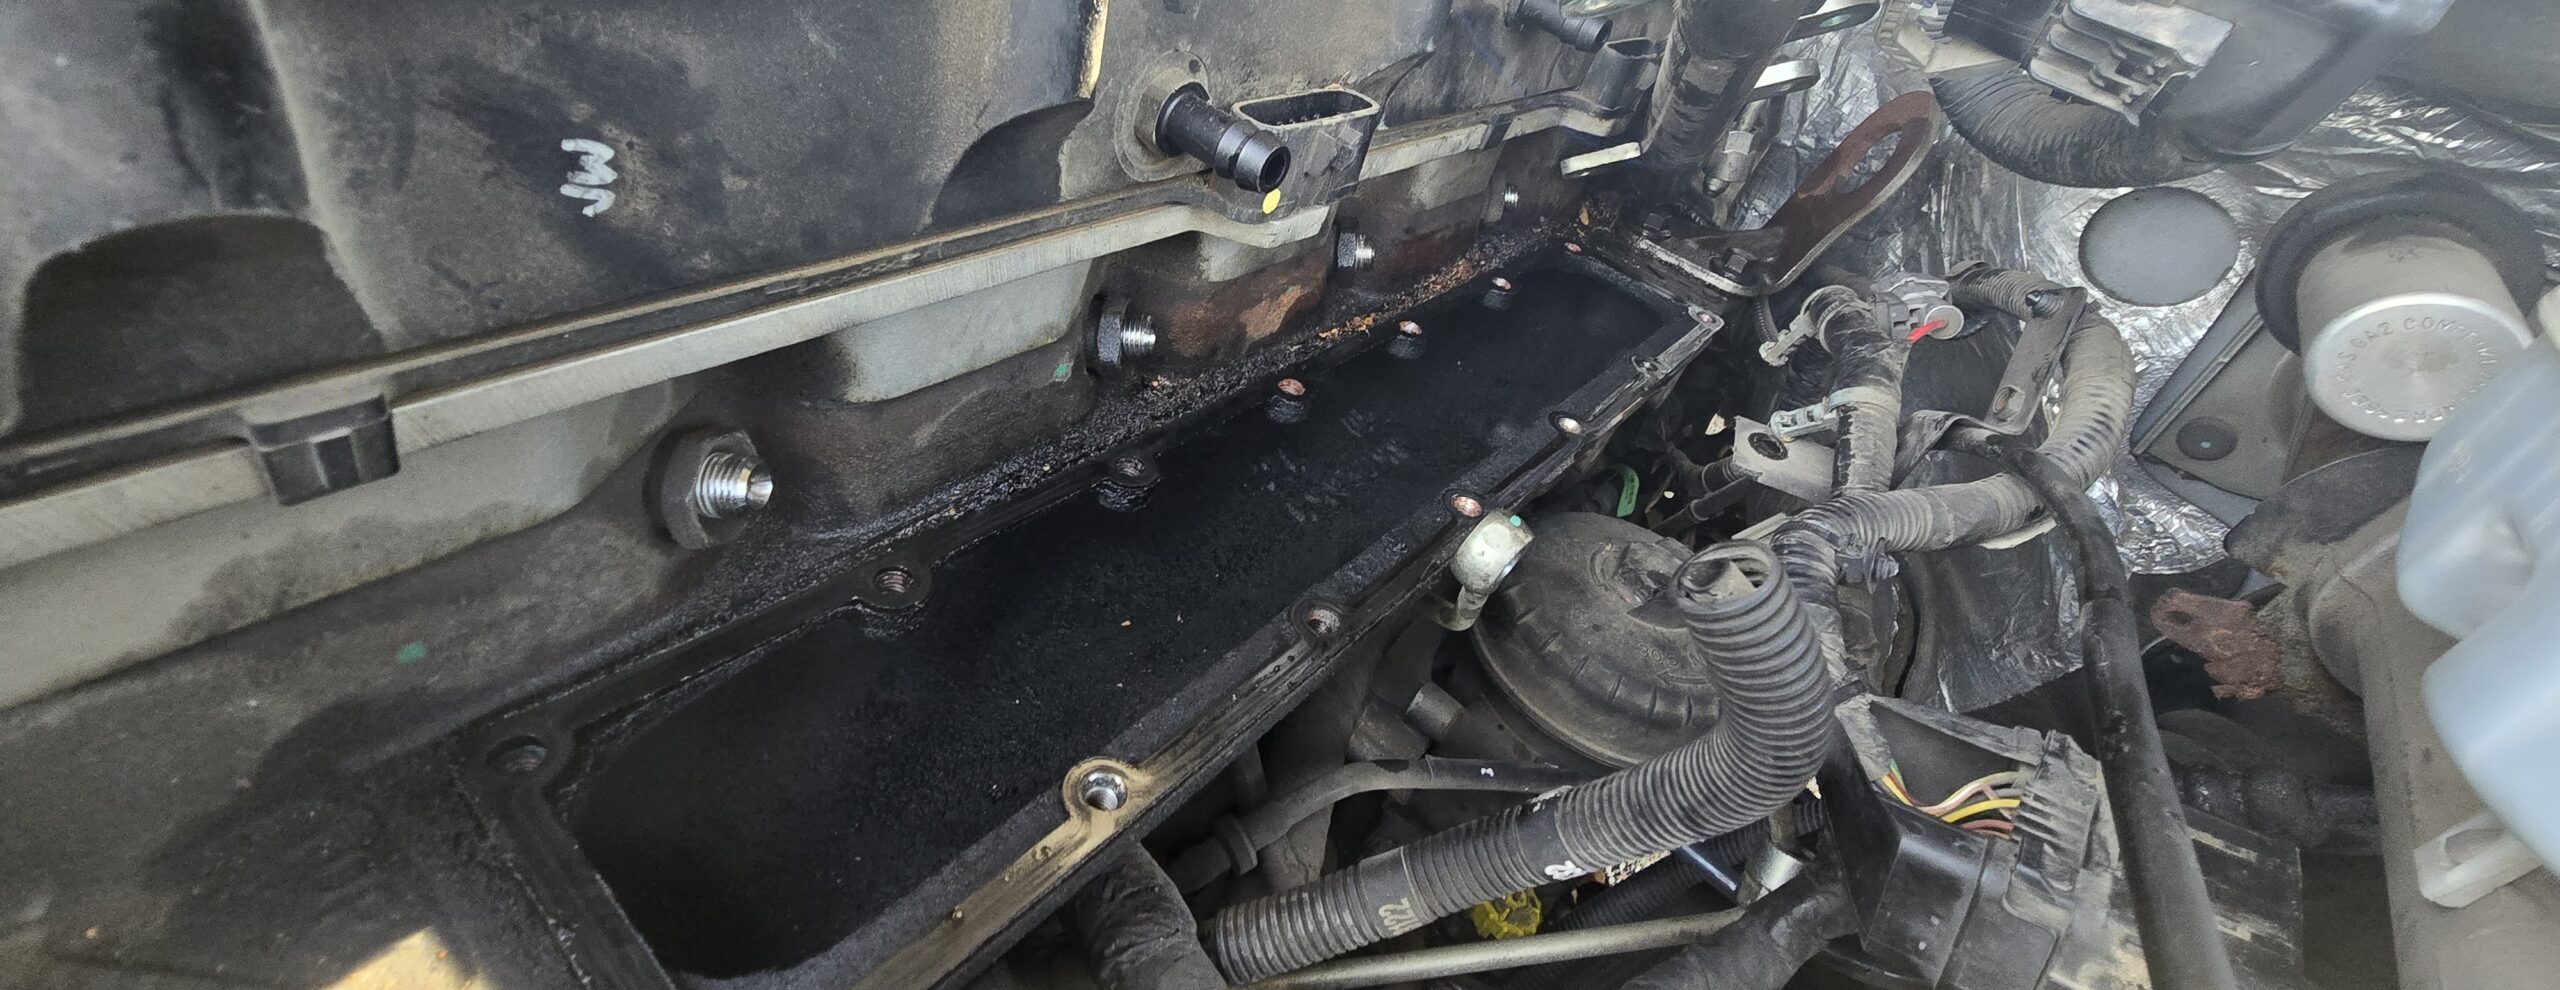
- Remove the intake plenum and disconnect the grid heater’s electrical supply line in the process.
- Remove the old gasket. (It should pull up in one piece.
Important Notes: Obviously, that is a general list, and I want to mention a few tips to help the process. First, you will have two openings on your intake tract at this point. One is at the engine intake plenum, and the other is the intercooler tube. These should be covered or taped until you are ready to reinstall. ‘Why do I recommend this?’, you might ask.
Simple, I was one bolt short at the very end of the reinstall. And although I didn’t think I dropped the bolt into the engine, I couldn’t rule it out. So I unassembled everything and scoped the engine inlet and intercooler. I never found the missing bolt; the gravel drive I was working in ate it, but I had to make absolutely sure the bolt was not in the intake tract before firing the engine. Otherwise, I could have very well created the problem this mod is meant to fix.
Second, there was significant carbon buildup in the intake horn and the plenum face. I cleaned these with carb cleaner before reassembly.
Third, keep track of your bolts. You are removing bolts of differing lengths from multiple locations.
Finally, don’t drop the banjo bolt or washers from the fuel supply line. These washers were very difficult to find on the gravel drive. Adding almost an hour to this job. I live in the middle of nowhere, so it would have been a wash time-wise heading into town for new ones.
Installing the Fleece High Flow Grid Heater Delete
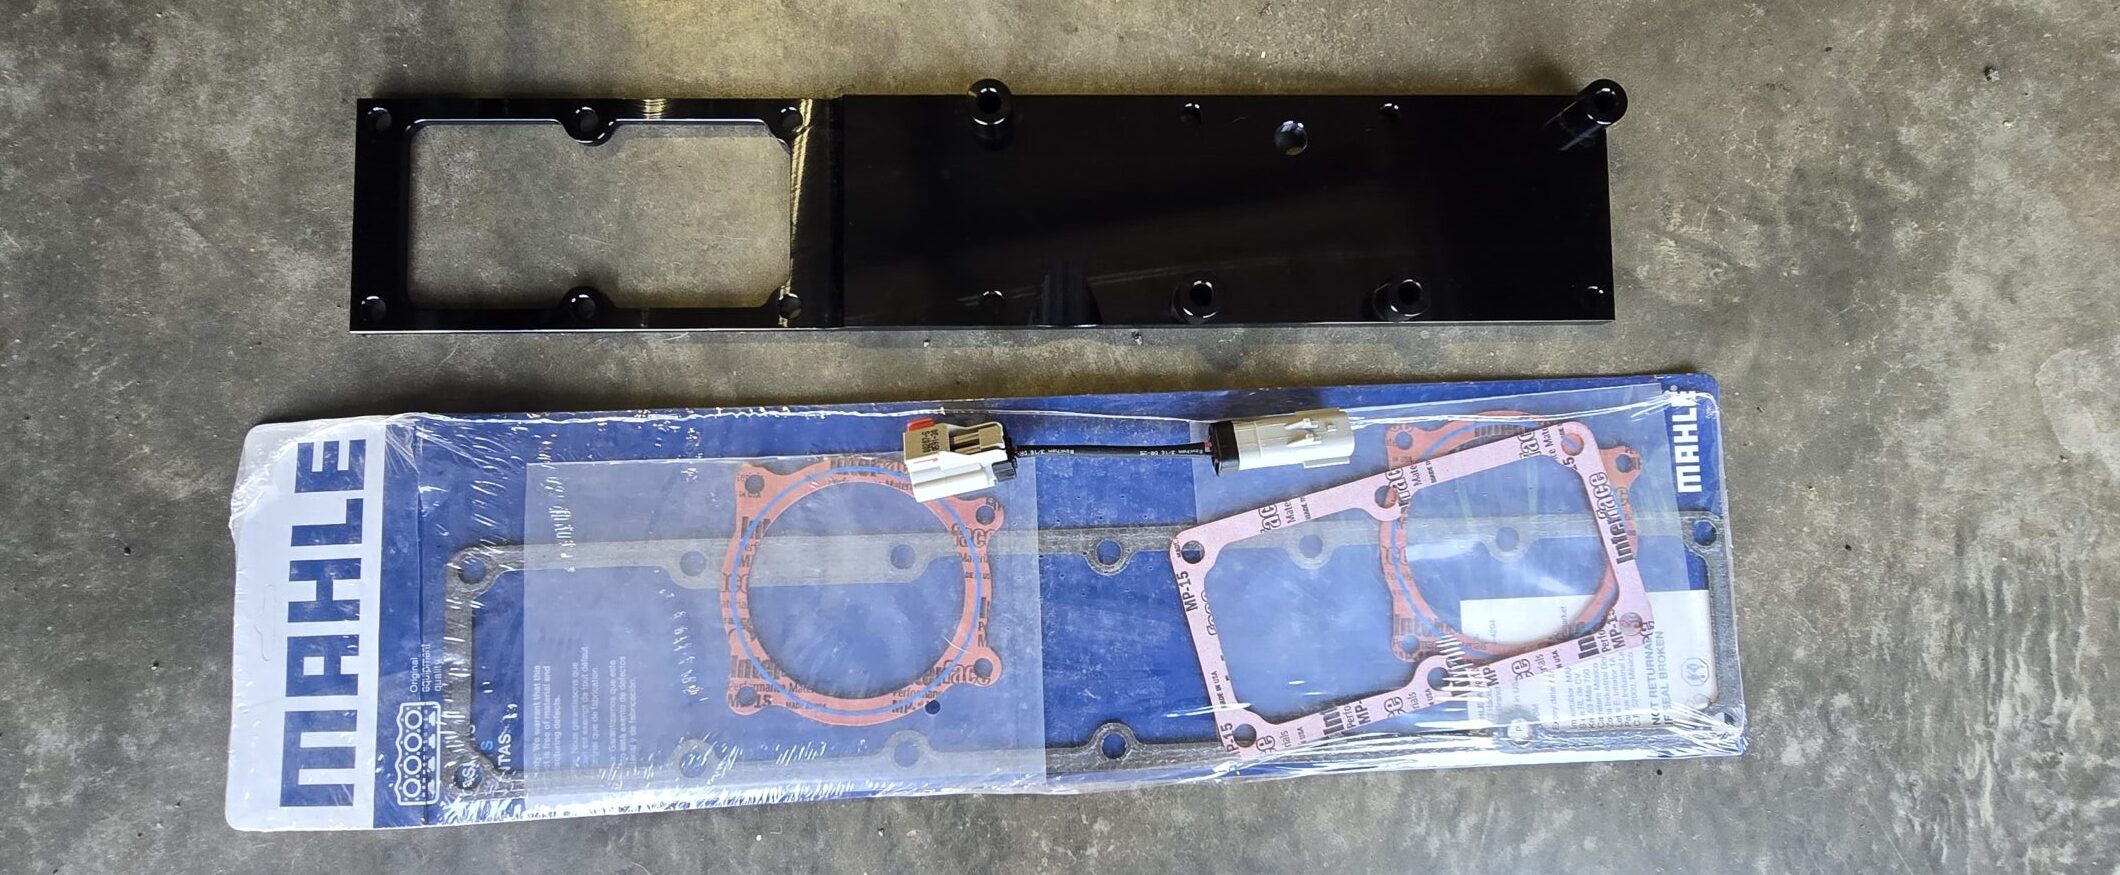
The Fleece delete consists of a new plenum plate without a grid heater, new gaskets, and an IAT sensor plug extender. By default, the new plenum plate makes the system ‘high flow’ as there is no way the factory grid isn’t a serious restriction.
- Remove the IAT sensor from the old plenum plate and install it into the Fleece unit.
- Take a shop vac and vacuum the intake manifold to remove any loose debris before reassembly.
- Place the new gasket on the intake manifold.
- Install the new plenum plate and tighten the bolts. (I loosely tightened the front bolts without installing the air horn. This keeps the gasket lined up and allows easy access for fuel line reinstallation.)
- Secure the fuel rail to the plenum plate, then reinstall the fuel lines. (The rear fuel line will slip into place if you tilt the fuel line up slightly in the front. Also, the fuel lines only align one way. If you mixed a line or two up, it should be pretty easy to figure out.)
- Reinstall the high-pressure feed. (Don’t forget the washers.)
- Now reattach the air horn to the plenum plate and the intercooler tube.
- Tighten everything down and reconnect all electrical connectors.
Important Notes: This is where this guide becomes a 2-part series. With a simple delete, you still have a high-amp electrical cable trying to energize on startup with no resistance. I temporarily wrapped the end in electrical tape and zip-tied it out of the way. Alternatively, you can trace the cable to the solenoid near the passenger’s-side battery and remove it there. Regardless, either method will consistently throw a CEL. In part 2, I will fix the CEL, but for now, the truck must be back on the road.
Also, when you first crank the truck up, don’t worry if it won’t start. The fuel lines can take about 30 seconds to repressurize.
The Free Grid Heater Delete
On a side note, I came across a pic which of course, I cannot find now, that would make the grid heater delete effectively free. This owner took the factory plenum plate off and cut the grid heater out of the plate. Then they smoothed the edges with a grinder and reinstalled the factory plate. I will post the picture here when I come across it again. Regardless, it was a completely valid method to achieve the grid heater delete at zero cost.
Conclusion
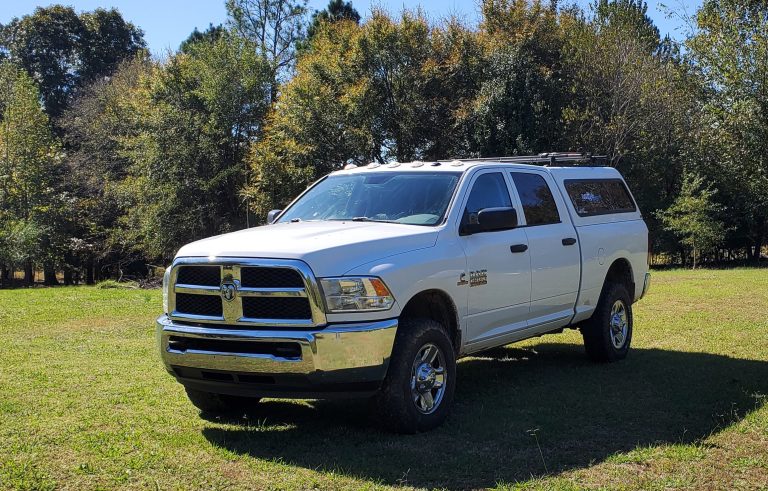
The grid heater delete on my 4th-gen Ram 2500 is an easy mod if you take a few considerations into account. It is also probably unnecessary, but it gives me an extra piece of mind for a truck I plan on keeping for a long, long time. As of this writing, I have put 1000 miles on the engine since the delete. Although I don’t notice any extra power, the engine does feel a little livelier. Definitely the result of the less restrictive intake path from removing the heater grid. I will dive back in during the mid-season break and permanently turn this CEL off.